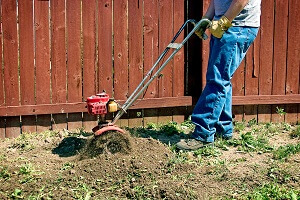
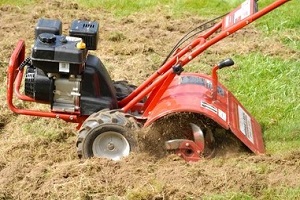
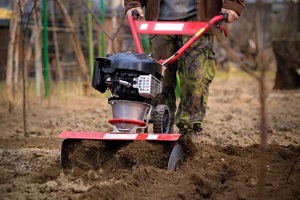
 Rototilling is a gardening process that aims to improve the structure of an area of soil. Commonly used to help create the proper environment for growing food, flowers or grass, it entails using a garden tiller to rotate soil thoroughly so that it can better absorb fertilizers and nutrients.
The tool that is used for this process is known as a rototiller or garden tiller. Most of the rototillers designed for home use have a set of wheels in front of or behind the tines to facilitate pushing the machine across the area that needs to be cultivated. The rotation of the tines in the tiller helps it to move forward, making it easier to operate.
A rototiller can reduce the amount of time it takes to hoe or dig soil to turn it over in preparation for planting. Hoeing and digging by hand across a large garden can take hours or even days, but these machines make the job a lot faster.
What Is Rototilling Used For?
Here is a look at some of the many applications of rototilling.
In the Garden
Rototilling is often used in the garden to prepare soil for new crops. It can break up large clumps of dirt, chop up any unwanted weed or plant growth, and aerate soil to allow the roots of vegetables and flowers to spread more effectively. Another popular use of rototilling in a garden is incorporating compost or fertilizer into the soil as it can work it into the land evenly.
A rototiller can also be used to loosen up compacted soil. Once soil has been compacted as a result of matted roots, flooding or a simple lack of planting across a long time span, a rototiller can help to break it up, making it easier to dig and plant in the garden and add soil amendments to it.
Landscaping
Rototilling is also a good approach for tearing out grassy areas on a property without moving the underlying soil. This is useful when you wish to remove grass for a patio expansion, place a planter bed, or lay down a walkway.
Because most rototillers allow you to control the depth of their tine penetration, the machine can be gently skimmed over the surface to ensure that just the grass and its roots are removed.
How to Use a Rototiller
 Rototilling is a complex job, and many homeowners find that hiring professionals to help is the best approach. However, individuals with experience using heavy machinery might consider doing it on their own. Here is a look at the steps involved.
Be Safe
If you’re interested in rototilling your garden, it is important to understand how to use the machine safely. Keep in mind that its tines are extremely sharp, and the constant spinning motion of the machine can pull loose objects and clothing or even your hands or feet into the blades if you do not proceed with great caution.
Therefore, it is best to wear heavy-duty boots, gloves, and eye and ear protection. You should also follow all of the instructions that come with the machine as well as the recommended safety precautions. Before rototilling, ensure that the area is clear of pets, children and tall weeds, and be sure to work when there is plenty of light.
Clean Up Debris and Check the Soil
Before rototilling, it is important to pick up any debris, rocks or sticks that could jam the tiller. When tilling a lawn, use a sod cutter to remove old sod before proceeding. You should also check the soil. If it is dry, moisten it lightly, taking care not to make it muddy.
A light sprinkling of water is usually enough to create the right texture. You can check it with your hands; if it crumbles easily, you can start tilling. If it clumps together, however, it is too wet and you should wait until it dries out.
Operate the Machine
Before you begin, set the depth bar of the rototiller to an appropriate level for your project. Six to eight inches is a good depth for deep-rooted plants, while four to six inches should be sufficient for leafy plants. If your tiller is equipped with a guard over the tines, be sure to put it down.
Add any additives you plan to use, such as fertilizer or compost, after performing one round of tilling and then go back and till again to mix the materials into your soil.
After tilling in one direction, such as east to west, turn around and till in the opposite direction (north to south) to ensure proper coverage. Then, rake the area using the backside of a bow rake to help smooth the soil and prepare it for planting.
Follow Up
Many experts recommend waiting two weeks so that any weed seeds that found their way into your soil will have time to germinate. Then, use the rototiller again to eliminate them to ensure your soil is fully prepared for planting.
Types of Rototillers
Rototilling is a broad term, and there are several different types of tools that can be used to get the job done. Here is a look at some of the types of machines you may encounter one embarking on a rototilling project.
Cultivators
A cultivator is a portable and lightweight machine that is suited to smaller gardens that need basic work, such as working in some fertilizer or removing light weeds. There are electric and gas-powered models available.
Garden Tillers
 Garden tillers are significantly more powerful than cultivators and can break ground, stir soil and plow. Front-tine tillers can weed, mix compost into soil, and break the ground for newer garden plots that have loamy or sandy soil.
Rear-tine models are more powerful and can be used to break ground on a new garden that contains very tough soil. Finally, vertical-tine tillers cut forward through soil instead of moving downward, enabling them to carry out the job much faster than other models.
Reach Out to the Professional Site Preparation Team
Rototillers are heavy machines that can cause serious injury if not operated properly. The gardening professionals at Dirt Connections offer a range of soil preparation services, saving you time and energy and ensuring that your garden has the right foundation for success. Contact us to find out more about our soil services.
Summary

Dirt Connections was started with one goal in mind: providing quality residential and commercial construction services to clients on time and on budget. Reach out for more information on how we can support your next project.
For your convenience our estimates are free and by appointment. Call 703-940-9949 for a free estimate today!


