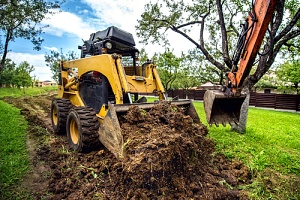
 Excavation is a necessary step to take for any construction project you have planned for your yard. Whether you plan on installing a deck, walkway, fountain, garden, pond, or maybe even an inground pool, excavating the land is inevitably going to be your first task.
However, do not just start digging and hope for the best. There is a (somewhat legal) process that must be followed in order to ensure the best results for your project.
This article will guide you through the procedure of excavating your yard step-by-step, so you know what to do and what to look out for.
1. Preparing the Site for Excavation
Before you start doing any digging, you need to have an idea of what is underneath. There may be power lines or pipes underneath that you want to stay away from. It is helpful to check with your local government to find out what the regulations are regarding excavating.
Also contact local utility companies (power, gas, water, etc.) and they should be able to provide you a map of what is found under your yard and where. This will give you a better idea of where you can dig for your project. The law requires D.C, Maryland and Virginia residents to call Miss Utility (811) before digging.
Once you are ready to begin, start clearing the area that you will be excavating. Remove any trees, bushes, rocks, plants, etc. If there are any structures on the yard like benches or sheds, they will need to be moved to another area while you excavate.
In regard to removing trees, keep in mind that the entire tree, roots and all, need to be removed to avoid any shifting issues later. The same goes for bushes in your yard.
2. Staking Out the Excavation Area
Now is the time to lay down the outline of the area you will be excavating. You can do this using white waterproof marking paint.
 Do not rush this step. Take your time as this will outline the size of your pool, garden, patio, or whatever it is you are building.
As you make your measurements, double and triple check all of them before making any marks. Just as you want to “measure twice and cut once” when cutting wood, the same rule applies for marking your lines.
This is the best time to make any final adjustments or changes to the measurements or size of your project. Once you start to dig, further changes will be much more difficult (if not impossible) to accommodate, so everything needs to be near perfect by this point.
3. Proper Tools and Equipment
Now that everything is in place, it is time to get your tools and equipment together. A few things you are going to need are:
- Shovel
- Wheelbarrow
- White marking paint (you should already have this from the previous step)
- Plastic tarp
- Gloves
- Boots
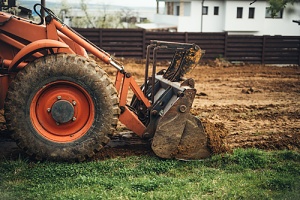
- Portable trencher or a mini-excavator (depending on the size of your project)
- Fill dirt
You should be able to rent a trencher or mini-excavator from your local hardware store. Unless you plan on doing a lot of excavating over the years, renting will be the better option to not only save money but eliminate the need to store the equipment.
4. Ordering Fill Dirt
With any excavation project, you will need to purchase fill dirt after your project is finished and the time comes to fill in the areas around the project.
 Fill dirt is non-organic material, so it will not shift or degrade over time, making it the perfect substance to keep the ground around your new structure level. Then, a thick layer of topsoil is applied on top of the fill dirt so you can begin growing any grass or plants.
If you are installing an inground pool, you may only need a little bit of fill dirt to make sure the pool is level.
However, for other projects like a building, large shed, patio, outdoor kitchen, or a garden or pond area with flowers, you will need to order enough fill dirt to fill in a majority of the area you have excavated.
One dump truck can carry 10 – 12 cubic yards (270 – 324 cubic feet) of dirt, and for a small backyard project you may only need one dump truck. When you are ready to order your fill dirt, contact Dirt Connections in Fairfax, VA.
5. Excavation
Now it is finally time to start digging. Depending on the scope of your project, you can dig with your shovel or the mini-excavator you rented. Lay down your tarp by your workspace if you can and place the dirt you dig up on top of the tarp, avoiding the bare ground. If you have to put your tarp somewhere else, use your wheelbarrow.
During this step you may want to have your soil tested for stability and check for any drainage issues, which you can fix by planting trench drains underground (which can also be bought at the hardware store) to help divert rainwater away from your new structure.
6. Compaction Testing
Compaction is a crucial step in the residential excavation process. Now that the soil has been removed, what is left needs to be tested for firmness and support, so that whatever structure you plan to build on top of your yard is stable and even.
This is where the need to purchase fill dirt comes in. The soil is going to do one of two things: swell or shrink. Fill dirt, however, will do neither of those things, and instead help provide a firm foundation that is secure.
Once the soil has been tested, fill dirt added, and the ground brought to a stable level, you can then begin to build your project.
Contact a Virginia Fill Dirt Contractor For Help
The steps outlined above should help you when it is time to begin excavating for your backyard project. Remember to check for utilities and clear any trees, bushes, or land debris that are in the way.
For any questions about residential excavation, or for assistance with your project that requires excavation, please reach out to one of our Virginia fill dirt contractors at Dirt Connections.


