If your concrete driveway has seen better days, you may be thinking that it is time to replace it. However, it may be possible to resurface your concrete driveway and enjoy many more years of use from it. Resurfacing can make an existing concrete surface look like it is brand new, and it is as easy as applying a special coating on top of the surface of the concrete.
There is no need to rip anything out, which can save considerable time, money and hassle. In addition, it is possible to find resurfacing coatings that are customized to suit your design needs. Here is a look at what is involved in the process.
Choose the Right Day
Firstly, you must consider the weather before beginning on a concrete driveway resurfacing project. In order for the resurfacer to cure, it is important to choose a day when the temperatures are expected to stay warmer than 50 degrees Fahrenheit for at least eight hours and above freezing for 24 hours.
Clean the Driveway

Before you can resurface a concrete driveway, you will need to prepare the surface carefully. Do not rush this step or you could compromise your results.
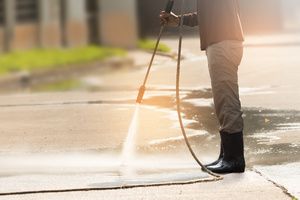
Begin by using a pressure washer to wash off all of the oil, dirt and any flaking concrete that could prevent the resurfacer from adhering properly to the surface of your driveway. If you do not have a pressure washer, you can rent one from your local home improvement store.
After cleaning the driveway, look for large cracks and use a patching compound to close them. Then, hose your driveway down until it is completely saturated and remove any standing water with a broom. This step will help to cool down the slab and stop the mixing water that is used with the resurfacer from being drawn out of it when you apply it.
Mix the Concrete Resurfacer
Next, you’ll need to mix the concrete resurfacer of your choice by following the directions on the label. For most resurfacers, it is best to use a power drill that has been fitted with a paddle mixer as hand mixing will often leave lumps in the product.
You will want to ask someone to help you with the next step. Take a 5-gallon bucket and fill it with 3.5 quarts of water. Then, while operating the mixing paddle in the bucket, ask your assistant to slowly pour the resurfacer into the bucket. Once it has all been added, keep mixing for at least 5 minutes or until it has all been fully incorporated.
When the mixture is free of lumps and has achieved a syrup consistency, it is time to stop. If you find that the mixture is too thick, you can add a little more water. If the mixture is too thin, add small amounts of resurfacer at a time until you reach the desired consistency.
You may want to ask your assistant to fit weatherstripping into your driveway expansion joints while you are mixing as this can prevent the resurfacer from filling them.
Spread the Resurfacer Across the Driveway

Next, it is time to spread your resurfacer across small sections of the driveway. You will need to work quickly, particularly if it is hotter outside as resurfacer hardens more quickly in higher temperatures. Keep the bag in the shade and use cold mixing water if you wish to increase the amount of time you will be able to work the product.
If you are resurfacing a bigger driveway, you may want to work in sections. Experts suggest focusing on areas that are no bigger than 144 square feet at a time, mixing and applying the resurfacer as you go.
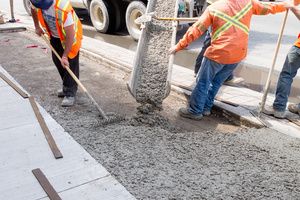
For each section, poor resurfacer out of the mixing bucket onto the driveway in strips measuring roughly one foot wide. Take a squeegee with a long handle and use it to spread the material back and forth across your driveway. You will want to make scrubbing motions to work the resurfacer into the concrete thoroughly.
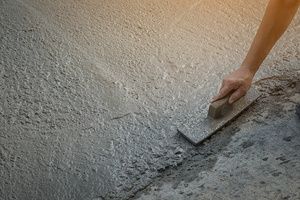
Then, let it sit for 5 minutes, at which point you may apply a non-slip finish if desired using a wide-headed concrete broom. If you wish to create a uniform appearance on the surface of your driveway, you can run the broom continuously across the work area, ensuring that each stroke of the broom goes in the same direction.
Leave It to Dry
Finally, you need to ensure you leave it to dry adequately. You will want to wait at least six hours after applying the resurfacing before walking on your driveway. Be sure not to drive over it in the first 24 hours. If you have resurfaced your driveway in very hot temperatures, such as above 90 degrees, you may want to lightly mist your driveway with water from time to time for two days after applying the resurfacer. It will cure on its own in mild weather.

Although it is possible to resurface your driveway as a DIY project, it is important to ensure that the resurfacing product is applied correctly. If not, your concrete driveway may experience issues such as bubbling and chipping.
There are a few problems that may arise during concrete driveway resurfacing. For example, if the product is not applied evenly because you are working at the wrong speed or lack the proper tools for the job, you could end up with unsightly splotches on the surface of the driveway. If the surface has been improperly prepared or cleaned inadequately, the resurfacing coating may not adhere very well. Furthermore, if you encounter inclement weather during the process, it could affect the quality of your results.
Get Started With the Northern Virginia Concrete Driveway Specialists
It is best to hire a reputable concrete resurfacer who has experience in your area for this important task. If you live in Northern Virginia, reach out to the driveway professionals at Dirt Connections. Our team has extensive experience in concrete paving and resurfacing, as well as decorative concrete, and we can meet the demands of projects of all sizes.
Summary

Dirt Connections was started with one goal in mind: providing quality residential and commercial construction services to clients on time and on budget. Reach out for more information on how we can support your next project.
For your convenience our estimates are free and by appointment. Call 703-940-9949 for a free estimate today!


