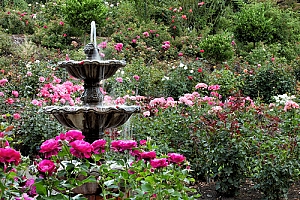
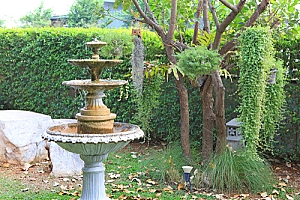
 Outdoor fountains can be a great addition to your yard. They add a lot of visual appeal and character, and the sound of running water transforms into space into a peaceful spot ideal for relaxation. Fountains can be expensive, though, and installing one improperly can cause a lot of problems. You can damage your yard or the fountain itself, but either would be an expensive mistake. Here is a brief guide that will cover everything you need to know about getting your yard ready for a fountain. This will focus on pedestal fountains, but the basic process does not differ much for different types of fountains.
Make Sure Your Ground is Leveled
Most ground is not naturally level. It may seem flat, but you would be surprised at how uneven a flat-looking piece of ground can be. Uneven ground can cause multiple problems for fountains. First, it can make the fountain unstable, and therefore more likely to tip over and break. Second, it can interfere with the water feature, causing it to spill more than it should.
 So, you need to level the ground. It doesn’t have to be perfectly level, as the weight of the fountain will flatten out minor imperfections. It does, however, need to be reasonably flat. The easiest way to do this is usually to add a layer of topsoil or fill dirt and smooth it out. Laying stones can also be a reasonable alternative. Either way, you will probably need to start by removing some or all of the topsoil that is already there, so you can be sure of creating a truly level base. You can do this with a small garden spade, since you are not working over a large area.
Add a Stone Base
In addition to leveling out the ground, you will want to add something to help support the weight of the fountain. This is essentially the same thing as putting down a foundation prior to building a home, but on a smaller scale. If you simply place the fountain on the dirt, it will sink as dirt alone does not bear weight well.
A two inch thick layer of 2B, sub-base crushed stone is a good base, and you should top that off with another two inch thick layer of screened stone. Use a hand tamper to tamp down both layers of soil. This serves to compact and level the stone, and will give you a more stable base in the future. This way, you will create a stable base that can support the weight of your outdoor fountain for a long time.
Dampen the Stone
Once you have the stone down, you need to stabilize it further. Spray it with enough water to dampen it all the way through, and then let it sit for about two days. This will help to solidify the loose stone into a solid mass. This is a crucial step; if you skip it, the stone base can fall apart. Without the water, it is just a pile of loose stones. The water helps to bind it all together.
After two days are up, you can lay down paver stones on top. This adds another layer of stability and it also looks nicer than the crushed stone.
Add the Pedestal
 With the base layer dampened and set, and the pavers laid down, it is time to add the pedestal. This is the moment of truth, as any unevenness in the ground or the base layer will be clearly visible once the pedestal is added. You may choose to fix the pedestal to the pavers with cement, but this is unnecessary. Plus, since the pavers are not attached that way to anything else, it does not serve much purpose. Simply place the pedestal on the pavers and adjust until it is in the position you prefer.
Border It
If you would like to take it one step further, you can add a border to your fountain. For this, you will need some larger, decorative stones, preferably ones that match your outdoor fountain. Create a solid border around the base of your fountain. You can do this immediately around the base if you like, or you can create a large border and fill it in with river rocks or gravel.
This does not serve any practical purpose, but it does create a more polished look that many people prefer. River rocks are larger and smoother than gravel, but they can also be more expensive. You could also create a small rock garden around the base of the fountain, with a mix of larger rocks, river rocks, and gravel.
Add More Stone or Soil as Needed
It is a good idea to have extra crushed stone and topsoil on hand. You may find throughout the process that you need more of one or both. If you put down the pedestal and notice that it leans to one side, you need to add more to the base. If you intend to create a large border around the fountain, adding a new layer of clean soil and maybe even a little crushed stone is a good idea before putting the river rocks down. It will keep them level and clean.
Bury the Power Cord
Unless you buy a solar-powered fountain, your outdoor fountain will have a power cord. Burying the cord is important for two reasons. First, a power cord running across the yard does not look good. Second, a power cord running across the yard will not last long. Animals will chew it up, exposure to the elements will damage it, and people will trip over it. Far better to dig a shallow trench and bury it.
For all your stone, dirt or topsoil needs for your fountain project, contact the professionals at Dirt Connections. We can help find the materials that you need for your DIY outdoor fountain project.


Summary

Dirt Connections was started with one goal in mind: providing quality residential and commercial construction services to clients on time and on budget. Reach out for more information on how we can support your next project.
For your convenience our estimates are free and by appointment. Call 703-940-9949 for a free estimate today!


