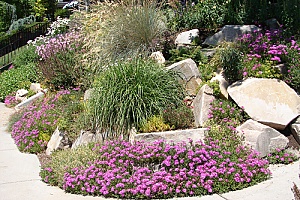
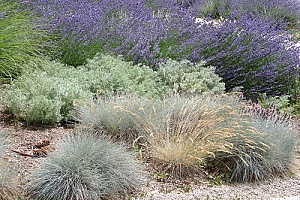
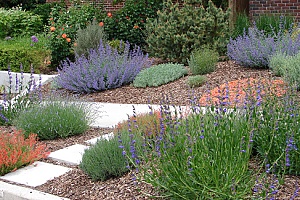
 A xeriscape garden is a garden that can thrive with little or no supplemental watering. In fact, the word “xeriscape” comes from the Greek word “xeros”, which means dry. To have a successful xeriscaping garden, you must install plants that are appropriate to the site; consider the plant’s needs for sunlight or shade, soil moisture and texture, exposure to elements, and so forth.
Xeriscape gardening is a fantastic way to beautify your property, help the environment, and keep the labor to a minimum. Who doesn’t like that?
Steps to Making a Xeriscape Garden
To help ensure your garden’s success and attract native birds and insects, consider choosing a good selection of plants that are native to your area.
Installing a xeriscape garden, or converting your existing landscaping to xeriscape gardening, is a job that a DIY’er can do in most cases.
Here are five easy steps to build your xeriscape garden:
1. Plan Ahead
Before you start digging or tearing out existing plants, evaluate your property. Identify sites where the sun shines all day. You will group your drought tolerant and sun-loving plants there. Identify sites where the sun shines only part of the day. You will locate shade tolerant plants there.
Evaluate the terrain. A level location will be easier to manage. Is the site low-lying and frequently damp? Is it on a slope with good drainage but sometimes subject to erosion? In addition to grouping plants according to their needs for sunlight, you will want to group them according to their needs for water. Plants that need more water should be located near a supplemental water source.
If you are installing new garden beds, use a can of spray paint to delineate the garden borders. Get out your shovel (or hire out the labor) and dig out the sod and existing soil to about six inches deep. Remove any existing plants that are diseased or that need to be relocated to another garden spot.
2. Arrange a Dirt Delivery from a Reputable Dirt Contractor
 If your garden site has low spots or poor drainage, you will probably need to correct it with fill dirt before you plant. Few plants will be able to thrive in standing water, and in most cases such a site breeds mosquitoes and snakes.
Do not underestimate your need for fill dirt. Fill dirt, or “fill”, is usually made of subsoil, which is found about 12 inches below the topsoil. It consists of partially broken down soil made up of a lot of clay, sand, silt, and stones, and any other materials found in the source ground. Its inorganic qualities make it ideal as fill because it is stable.
The amount of fill you need depends on the garden size and other factors associated with the configuration of the area. Perhaps your plans call for a patio, or a paved or graveled path through the garden. Fill dirt will give you a solid base for any such hardscapes. Your fill dirt contractor can discuss your plans with you, help you calculate the amount of fill you need, and deliver it right to you.
Once your low areas have been filled, leveled, and appropriately graded to ensure proper run off, you will need to top it with a few inches of garden soil. You need garden soil on top of the fill because fill dirt is not suitable for planting materials. It lacks the organic qualities needed to support plants. Your dirt contractor can help you calculate the amount you need and deliver it directly to your site.
As long as your dirt contractor is delivering topsoil for your filled areas, you may want to go ahead and have top quality garden soil delivered for the rest of your xeriscape garden. Improving the soil with good quality compost or other remediation can make a big difference in the health of your garden, which means less work for you!
3. Select Arid Plants and Plant Them
As you choose plants, refer back to the planning you did in step 1. Choosing native plants that are suitable for the site is a smart idea for xeriscape gardening. You won’t have to work as hard keeping them watered, and they won’t need the extra fertilizers and pest control chemicals to survive. Arrange your plants in a pleasing design – usually taller ones in back. For each plant, dig a hole much larger than the plant root ball; place the plant in the hole with the most attractive side facing out, and backfill the hole with garden soil. Tamp gently. Water well. Keep in mind that for the first season and until the plants establish themselves, they will need regular supplemental watering.
4. Add Mulch
 Mulch is so important to xeriscape gardening success. Mulch keeps your plants’ roots from baking in the sun and deters weeds. Several inches of mulch also helps hold moisture and nutrients in the soil. Use some form of organic material for mulch such as chopped leaf matter (avoid using grass or weed clippings), shredded bark, pine needles, or compost, or some mixture of those. It will gradually decompose and nourish your soil, which in turn feeds your plants. This means you don’t have to water or fertilize as often as you would without mulch. When you first install your plants, water them and immediately put down about 4 inches of mulch. You may have to replace or replenish it the next season.
5. Enjoy!
By the end of the season, the wildlife will have found your new xeriscape garden. To draw in more birds, add a well-placed bird bath, a birdhouse or two, and consider a feeder in the winter months. If you leave your native plant stalks and seed heads until winter is over, you will have many winged visitors.
Need Assistance With Your Xeriscape Garden?
For help creating your xeriscape garden, speak with the experienced fill dirt contractors at Dirt Connections. They are happy to provide you with more information on how to make a xeriscape garden and schedule a Virginia fill dirt delivery.


