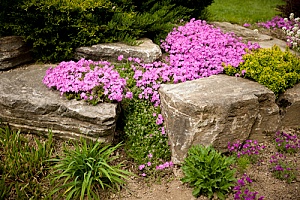
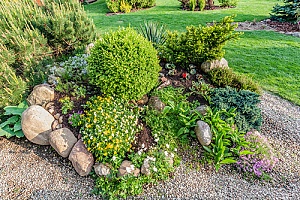
 A rock garden is a low maintenance decoration that can transform your front, back, or side yard into a more elegant space. The project can easily be completed in a weekend, making it an excellent way to kick off the summer season with a quick backyard renovation. You can make your rock garden any size or shape and fill it in with a variety of plants, depending on the style of your yard area.
Materials to Make a Rock Garden
To create your own rock garden, you’ll need the following tools and other materials:
- Shears
- Leaf blower
- Hoe
- Rake
- Crowbar
- Edger
- Wheelbarrow
- Shovel
- Crushed limestone
- Peat moss
- Mulch
- Boulders
- Flowers and plants
- Fertilizer
- Marking paint
- Flagstones
- Fill dirt
- Topsoil
 Fill dirt and topsoil are essential but often overlooked materials in the creation of a rock garden. Fill dirt creates a strong base for the rocks, allowing you to insert them into fixed areas with less movement and settling over time, and topsoil provides your plants with the nutrients they need to grow. Fill dirt contains no organic matter, so it’s important to use both types of soil to create a strong and healthy garden. Otherwise, your stones may slide and your plants may fail to take root.
When it comes to stones, consider the overall look you’d like and choose stones accordingly. You can use large boulders, smaller rocks, flat stones, flagstone, and even colored stones for your garden. A combination of different styles and sizes can create an eclectic feel, while uniform stones may look more refined. Consider the size of the area and the style desired before purchasing your materials to ensure that you have enough of each type to complete your garden installation in a timely manner.
Steps to Building a Rock Garden
Begin by removing brush, bushes, undergrowth, and other debris from the area in which you plan to install your rock garden. A leaf blower can help you save time in this process. Use a shovel to dig out bushes and shears to cut the branches, if necessary. After removing larger vegetation, use a hoe to clear out smaller plants. Create a deep edge using an edger to shape your rock garden area and ensure that dirt and stone do not wash out onto the lawn. You can fill in this edge with a border of rocks after you’ve moved larger boulders into the space first.
Choose a Design
Next, choose a design and mark the area with paint. You can easily remove the paint with water and additional dirt, so don’t be concerned about trying out various shapes and styles. Note, however, that simpler shapes will likely be easier to fill and arrange neatly. After finalizing your design, spread fill dirt in an even layer across the bottom of your garden shape. This dirt will give the stones a stronger foundation, make it easier to create a footing for the stones, and prevent them from moving as the dirt settles.
Install Stones
You can now begin installing your stones. Roll heavier stones into place using a crowbar first, and create a footing to help the boulders stay in place. Fill in the remainder of the garden area with smaller stones, and sprinkle more fill dirt between them to create a stronger lock for the stones. This helps keep your garden from slipping during heavy rains and prevents dirt and plants from becoming displaced.
Place Topsoil
 After installing the stones, spread a thick layer of topsoil into the garden where you plan to plant flowers. Choose species that don’t need much water and are suited for your climate to help decrease the amount of maintenance needed. Ground cover plants with a few carefully chosen flowers look beautiful but do not require too much attention.
Add Decorations
For additional decoration, you can create a riverbed with bushes, small boulders, and river stones. Set the bushes with peat moss and fertilizer, then dig out the riverbed following the lines of the bushes. Use the boulders along the border of the bed to create a natural flow, setting them in a footing of fill dirt. Then, add the riverbed stones or crushed stone. You may want to install landscape fabric prior to this step if your yard tends to sprout weeds easily, allowing you to spend less time maintaining your garden in the future.
Set Plants
You can now finish setting plants throughout your garden. Mixing textures and colors can make your garden look as though it is part of the natural landscape, but a uniform texture can help create a more intentional look. If you’re using plants that come in a container, be sure to take them out and loosen the roots to allow them to take in water faster after planting. Dig holes that are twice as wide as the plant’s roots and shallow enough to allow the top of the plant to stick out a quarter of an inch. Add mulch to help feeder roots at the top soak in water quickly and help the plants remain healthy.
Add Walkway
Finally, add in a walkway to give you a good place from which to weed and water your garden. Lay the stones and trace them with your shovel, then remove the stone and dig a footing for each one. Use fill dirt to add a stronger foundation for the footing if your chosen area is shallow or difficult to dig up. You can add river bed or crushed stone and mulch in between each stone to add a decorative touch and give the walkway a more finished appearance, if desired. Your rock garden is now complete and ready for enjoyment.
Speak to a Fill Dirt Contractor
Contact Dirt Connections to schedule a free Virginia fill dirt delivery or to speak with an experienced fill dirt contractor. Dirt Connections has years of experience in helping Virginia area homeowners transform their lawns with pool removals, fill dirt deliveries, and more. Its team of experienced contractors can help you order the correct amount of fill dirt for your project, schedule a site inspection and delivery time, and even arrange for the removal of excess dirt after your project has been completed.


