 If properly constructed, a raised garden bed can make your garden dreams come true. What garden lover doesn’t want a full season of fresh, healthy vegetables, and vigorous shrubs and flowers that fill your yard with beauty all year?
Benefits of a Raised Garden Bed
With a well-built raised garden bed, you will have better plant productivity due to:
- Better water retention and better drainage.
- FEWER WEEDS, and they are easier to remove.
- Longer, healthier growing season.
- Nice pathways allowing easier access.
- FEWER WEEDS.
- Proper pH because you are installing the soil.
- Better soil erosion control.
- FEWER WEEDS.
- No soil compaction.
- Fewer pests.
Did I mention perhaps the biggest benefit: fewer weeds?
Guide to Building a Raised Garden Bed that Will Last for Years
Building a raised bed is fairly easy. It just takes a little planning. After all, it is just a large planting frame that contains good quality soil and garden plants aboveground. You can find many ways to cut corners, but the benefits of doing it right are well worth the effort.
Here’s how to do it:
 1. Choose your garden location. For a raised vegetable flower garden, you need a fairly level spot that gets six to eight hours of sunlight each day. If you do not have a sunny level location, you may need to terrace it and bring in fill dirt to provide a stable, level base for it. The right location may dictate the garden size. If you plan to build a raised bed for foundation or border plantings, you will want to make sure the garden base is sloped away from existing or planned structures. Call Miss Utility before you finally decide on your location to make sure you will not be digging into any underground cables.
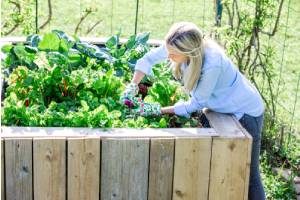
2. Decide on the garden size. One of the benefits of a raised garden is the ease of access for tending to it. Usually, a four-foot width allows you to reach plants and soil in the front and back of the garden without stepping into it. The length of the garden will depend upon the garden’s location, the quantity of plants you want to grow, the aesthetics the garden brings to your site, and other practical considerations.
Consider that the framing materials you prefer to use are frequently available in standard sizes. For example, lumber comes in four-foot sections. Stacking stones of about 1 foot in length come in pallets, and so forth. Make constructing the frame easier by planning your garden dimensions to fit with the materials you wish to use. The depth of the bed is ideally about 12 inches deep, but the depth can vary and can depend on the site and the type of plants you will grow.
3. Prepare the site. Cover the garden site with a tarp, cardboard, or sheet of plastic to kill any existing grass and weeds. It will take several weeks. Once it dies, you can remove the vegetation, and then break up the soil six to eight inches deep.
 4. Install frame for a timber bed. You will need to use treated wood for a timber bed. If you prefer to avoid pressure-treated wood, you can use cedar or other wood that contains natural oils which prevent rotting and pests. They are more expensive but they will last a long time. You can also choose 2-inch-thick boards.
If you are using a pre-fab kit, follow the manufacturer’s directions for construction. If you are making your own, begin by driving wood stakes at every corner of the bed. For beds longer than four feet, drive stakes at intervals for more support. Place the stakes so they will be on the inside of the bed and less visible.
Drive the stakes about 2 feet into the ground, leaving the top of the stakes exposed aboveground. Make sure the tops of the stakes are level and at the same height, or you will have uneven beds.
Begin with the row of lowest boards on the shortest side of the bed. Set the lowest board a couple of inches below surface level. Complete the lowest row by working your way around the perimeter of the bed. Once the lowest row of boards is completed, begin on the next row and work your way the perimeter. As you work with each board, make sure each one is level. Nail or screw the boards to the stakes using galvanized nails or screws. Add additional rows of boards working your way around and then up, levelling each one and attaching them to the stakes. Cap it off with a board turned on its side so you have a place to sit while you work.
5. Install a stone frame. Instead of a wood frame, you can use concrete blocks or bricks. Using a masonry construction will require that you use crushed stone and fill dirt to provide a secure base for the frame. Also, masonry will affect the soil pH over time, and you will likely have to amend the soil. Additionally, local laws may require permitting for a masonry structure that will exceed a certain height. Be sure to check on those requirements before you begin a masonry project.
 6. Add the soil. Now for the fun part. You will need to fill your beds with a nutrient-rich mix of topsoil, compost, and other organic material. You can easily get a good quality mixture from a garden center, or save your back and some time by getting it from a reputable dirt supplier. You will not benefit from using topsoil from elsewhere in your yard. Yard topsoil contains weeds and pests that will infest your new raised beds.
Contact Dirt Connections for More Information
Building a raised garden bed is a great way to have a beautiful garden. Don’t let your hard work go to waste. Ensure its success by getting the dirt you need for it and get the best quality. Speak to the Virginia fill dirt specialists at Dirt Connections for more information and to order a free fill dirt delivery.


