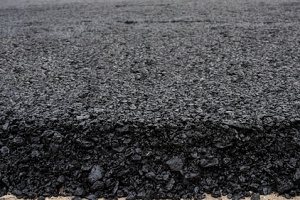
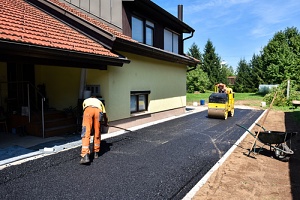
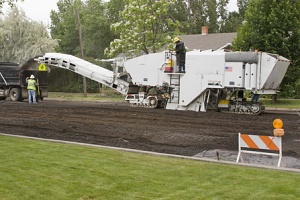
 Asphalt millings are recycled bits from old asphalt after it is taken up and then ground into gravel. The millings are used by spreading them on a road surface or driveway and then compacted. They are also used as a base for later paving with hot mix asphalt or tar and chip. Once compacted, the recycled asphalt millings will form a surface almost as solid as paving with hot asphalt mix.
Not only are asphalt millings popular because they are eco-friendly, recycled material, but they are also budget-friendly because they require very little maintenance. Be aware, however, that the initial installation can be more costly than traditional asphalt, but the cost is very job-specific.
Guide To Hardening Asphalt Millings
When paving using traditional asphalt, the installation involves a “hot mix” of asphalt which is spread using special equipment. In contrast, asphalt millings are laid without using heat. This “cold mix” asphalt is laid and cured at the ambient outdoor temperature. The best way to finish it once it is laid is to compact it with a steamroller. Once properly compacted, the surface will harden nicely over time.
1. Applicable Regulations
Comply with applicable regulations before you begin. Your community or your HOA may limit or restrict your ability to use asphalt or asphalt millings. Ensure to check the rules established by your HOA on the use of asphalt millings before using them for your project.
2. Prepare The Site
If you are building a new drive on top of soil, make sure it is graded so you have proper drainage. You will want to ensure that water runs off the sides of the driveway or straight to the bottom. Then, rent a drum roller compactor for the day and carefully drive it over the base soil to compact it uniformly. Cover the compacted soil with coarse, jagged gravel. Make sure you use a proper road base mix to allow drainage. Leave it alone to settle for several days. Letting it settle will create a stronger, more stable base for the asphalt millings and allow you to spot and correct any potential issues with your initial compaction.
If you are paving over an existing asphalt driveway or parking lot, drive over the area and look for areas where the existing asphalt is loose. You need to remove those loose pieces and fill the areas with gravel.
3. Evaluate The Asphalt Millings You Plan To Use
 Discuss the processing with your asphalt millings supplier. The supplier should screen the millings to make sure that none of the pieces are larger than two inches. If needed, millings larger than two inches in size can be crushed smaller.
The supplier should determine if the millings contain a lot of fine material, or whether they are coarser. Either way, the supplier will need to add an emulsion. An emulsion is an additive that contains suspended droplets of asphalt in water that will help to bind the mix. The emulsion should be designed for a cold mixture of asphalt. For coarse material, it needs an added emulsion percent of 2.5 to 3 percent. For fine material, use an added emulsion percent of 3 to 3.5 percent.
The supplier will then add the proper amount of emulsion to the screened millings in the pug mill and then mix the combined emulsion and millings in the pug mill until a homogeneous material is created.
4. Deliver The Asphalt Mixture To The Job Site
Once properly mixed, the millings will be delivered to your project site where the appropriate heavy paving equipment is waiting.
5. Dump The Asphalt Millings
There are two ways you can dup the asphalt millings:
- Into the Asphalt Millings into a Spreader or Asphalt Paver. Your contractor will spread the millings using a spreader or asphalt paver. Place about four inches of the recycled mix over a soil or gravel subgrade.
- In Piles along the Driveway. If you are a DIYer, you will need to be ready with a bobcat (and operator if you are not experienced) to move the asphalt into place. For more precise edges, you may need to hand shovel asphalt. Using the rack bucket of a bobcat as a leveler, asphalt can be smoothed across the road base.
6. Compact the Millings
 Your contractor will do a first run of compaction using a 25-ton pneumatic-tired roller. The next run should be a 12-ton or larger double drum vibratory steel-wheeled roller. The steel drums should be wet to avoid material sticking to the roller.
If you are a DIYer, you will need to be ready with a drum roller (and operator if you are not experienced) to compact the surface. Aim to achieve a 45-degree angle along the edges to help water runoff.
7. Seal The Millings
Seal with a layer of chip seal mix over the recycled milled pavement or a 1.25-inch layer of the new asphalt surface.
Benefits Of Using Recycled Asphalt Millings
Recycled asphalt millings are also popular because they are less susceptible to the elements than traditional gravel material and they do not need frequent patching and resealing. In fact, the asphalt millings get stronger and harder over time, instead of breaking down like hot asphalt tends to do. With normal traffic and wear and tear, a surface made of asphalt millings can last twenty to thirty years, with very little maintenance. The key to success is a proper installation at the very outset and time to harden the surface.
Contact Dirt Connections For More Information About Asphalt Millings

Before you start your project, consult with the dirt professionals at Dirt Connections about asphalt millings. They can help you make sure your site is properly prepared for delivery and assist you in calculating the amount of material your project needs and how best to harden asphalt millings. Contact them for more information about your project or to schedule a delivery.


