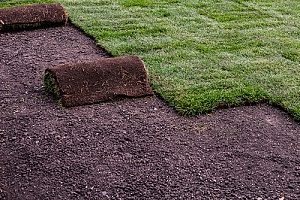
 If you want to improve your golf game, you have to practice putting. Lots of golfers spend time at the driving range but not enough time putting. The easy way to remedy that is to install a putting green in your backyard. The key to success is making sure your putting green is constructed on a stable, level base made of inorganic fill dirt, as described below.
Practice Putting in the Comfort of Your Own Backyard
You can hire a professional to do it for quite a lot of expense. On the other hand, you can build one yourself for a lot less money if you’re up to the challenge. Learn how to create a putting green in your backyard with synthetic turf in 10 simple steps:
1. Select a Level Site
Choose a spot in full sun away from structures like walls, heavy trees, or fences. With adequate sunlight, the grass will be better able to thrive. A spot with good sunlight and plenty of air circulation will help keep mold and disease at bay.
It is very important to ensure your putting green is level. Stay away from low spots or any area that collects water. If you cannot avoid low areas, you will need to bring in fill dirt to elevate the low areas and level it. If your entire backyard is low, you will need fill dirt to elevate and stabilize the green.
2. Decide on the Shape
This is where you can decide how big your putting green should be and what shape you want. The width of most synthetic turf is 12 feet, so you can save yourself some effort and avoid too many seams and a lot of cutting if you plan on widths of 12 feet when designing your green.
You can use a rope or a garden hose to outline your green. Make it into a simple shape or one that follows the contours of your yard. You can even try to make it in the shape of a green at your favorite golf course. Once you like the size and shape, use spray paint to paint the outline on the lawn. Also decide on how many holes you want your putting green to have.
3. Remove the Sod
 Depending on the size of the putting green and your own physical ability, you can use a shovel to remove the sod or rent a sod cutting machine. You will need to dig out a minimum of 4 inches of dirt. Make sure to keep the subsurface flat or sloped to no more than 2 percent.
4. Install Subsurface Gravel
In areas where the subsurface soil is high in clay, drainage will be a problem. First, place a weed barrier fabric on top of the subsurface area. It will help with stabilization and does not allow the subsurface material to sink into the ground. Next, install a layer of crushed gravel to provide a solid base underneath the putting green and help drainage. Compact the gravel with a tamper or lawn roller until it is smooth.
5. Install Edging Border
Add an edging as a border along the entire outside perimeter of the putting green. This will help contain the stone dust material will when you compact it and prevent it from being pushed out beyond the putting green when compacting the base.
6. Install and Compact the Stone Dust
Install a layer of stone dust over the gravel and compact it until the stone dust is flat and level. Make a slight slope to the stone dust base for proper water drainage. A good rule of thumb is a 1 inch drop for every 10 to 12 feet in length.
Compacting the stone base is critical to the success of the putting green. If you do not compact it properly, it will settle and create undesirable irregularities in the surface of your green. Rent a plate compactor and do it right. First wet the sub base lightly with the spray of your garden hose. Then compact the sub base. Compact it several times over the entire length and width of the area. Add or subtract stone dust for more contours, and compact it until you have the surface you desire.
7. Install the Cup Holes
 Use a small trowel to dig the holes for the cups. Once the holes are dug, you can use fast drying concrete to hold the cups in the substrate. Take time to ensure the tops of the cups are flush with the surface.
8. Install Synthetic Turf
Synthetic turf for putting greens is becoming more prevalent than natural turf. It requires significantly less maintenance than natural turf. You do not have to trim it or water it and it has better durability. If you are not using grass seed, install the synthetic turf on top of the subsurface stone dust layer. Use landscape or sod staples to secure it.
9. Add a Layer of Sand to the Green Surface
You will want to open the fibers of the turf by brushing the surfaces of the synthetic green back and forth with a push broom. Use a drop spreader to put down a layer of sand across the whole green. The sand will help the fibers stand up better and absorb the shock of balls hit on the green. You can give the surface a lusher look by adding a layer of green or black sand on top of the white sand.
10. Cut Out the Holes
Find the holes you made in the substrate by feeling around on the green surface. Use a knife to cut an “X” into each hole and use scissors to carefully trim around the inner edge of each cup.
Speak to an Expert Fill Dirt Contractor for More Information
Before you start building a backyard putting green in the D.C. area, make sure you contact the experts at Dirt Connections for more information. They are happy to discuss your putting green project and help you order a free fill dirt delivery.


