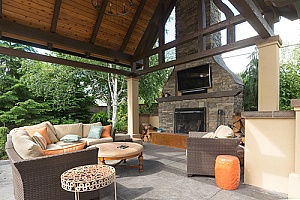
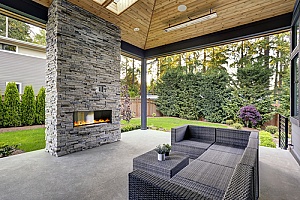
 An outdoor fireplace is a great addition to any yard. They can be a great way to experience all the fun of a campfire without leaving the comforts of home. You can spend summer evenings with your family toasting marshmallows for s’mores, or crisp autumn nights with hot cocoa or cider by the fire.
Gathering around a fire is something that everyone enjoys. It is a primal experience, humans have been sitting around the fire, telling stories and eating and drinking together since the dawn of time. A fire is both comforting and exciting, and building a permanent spot for a fire in your backyard turns your yard into the focal point for any gathering. Learning how to build an outdoor fireplace on your own can be both rewarding and convenient for you and your family and friends year-round.
Steps to Building an Outdoor Fireplace
Building an outdoor fireplace is fairly simple, too, so long as you follow the right steps. Here’s how to build an outdoor fireplace in your backyard:
Step 1: The Foundation
Every good fireplace needs a solid, level foundation. Begin by removing any grass and topsoil in the area you will be building your fireplace in, and then spreading a layer of fill dirt there.
You may need to dig to to a substantial depth, and the fill dirt will be crucial for providing a level surface for your fireplace. Removing the existing topsoil and replacing with fill dirt helps you to control the stability of the ground that you are building your fireplace on.
Fill dirt has the advantage of being more stable than topsoil, because it is more compact with less space between the particles.
Step 2: Lay Down Brick or Stone
Fire bricks are a good choice. You may also want to first put down a layer of crushed stone and wet it to form a firmer foundation. A layer of concrete works, too. Top this off with the fire bricks.
This is what will set your fireplace apart from more typical fire pits. Bricks not only look nicer, but they still and reflect heat, adding to the warmth generated by the fire. Be sure to use a layer of mortar on the concrete or crushed stone to hold the bricks in place.
Step 3: Put In the Grate
 A fireplace needs a grate to hold the wood. This makes it easier to get the fire started and to keep it lit than placing the wood on the ground, because you get additional airflow underneath the wood. Exactly how you install the grate will depend on the overall design of your fireplace.
The simplest design is just three brick walls around the fireplace, to direct all the heat in one direction. With this design, you would lay the grate on top of the bricks before completing the walls. You might choose to install the grate on top of the second or third layer of bricks, for instance.
Then you would continue to lay down bricks on top of it to build sufficiently high walls, and the weight of the bricks would hold the grate in place.
Step 4: Build the Firebox
This is where the fire will be, and it surrounds the grate you have built. While you can get away with regular brick and mortar for the rest of the fireplace, the firebox must be built of fire bricks and lines with fireclay, which can be bought as a ready-made material or mixed at home.
You will be using the fire clay instead of mortar. Lay the bricks down on top of your base, and underneath your grate if you have one. You will then lay them around the edges to either line the existing brick walls or construct walls on three sides of the fireplace. The height is up to you, as it depends on how big of a fireplace you want.
Step 5: Build the Throat
The throat is the top of the firebox which tapers down to the size of the flue. This is the tricky part. You will need to use a technique called “corbeling,” in which you overhang each new layer of brick to gradually narrow it down. It will look like an inverted staircase.
As you overhang each new row of bricks, you need to add a new layer of masonry on top to keep the weight balanced. Keep doing this until you have narrowed down the roof of the firebox to the size of the flue.
Step 6: Build the Flue
Set your flue line in mortar in the opening to the firebox, and then slide your cinder block flue blocks over it until you have reached the desired height. This is possibly the simplest part of the job.
Step 7: Stonework
 This is where you get to make your fireplace truly your own. The stonework is essentially a veneer around the outside of the fireplace. It is also the reason why it is so important to have a strong, stable base of concrete or crushed stone, because the stone work will make your fireplace very heavy.
Set each stone in mortar to hold it in place. In general, you should always set one stone over two or two stones over one for the best results. You will also need a long stone for the lintel if you do not know how to build an arch.
Reach Out to Dirt Connections For More Information
Much of the material you need can be found in stores, but fill dirt can be harder to come by. It is crucial for providing stability and bearing the weight of the fireplace, though. If you need a fill dirt delivery or would like more information about how to build an outdoor fireplace, contact the professionals at Dirt Connections. They can schedule a dirt delivery and provide information on any other DIY backyard projects you have in mind.
