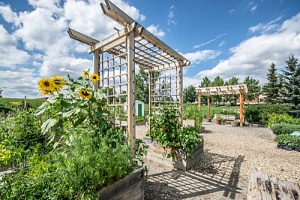
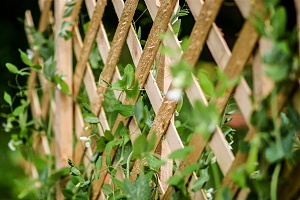
 When well thought out, a trellis can add vertical design and beauty to your landscape. It can be a focal point, frame a separate focal point, support climbing plants in your yard or vegetable garden, and/or provide a dappled shade. The good news is that any DIYer can build a trellis that is perfect for the space.
Beautify Your Landscape With a Trellis
Here is a step-by-step guide on how to build a good sized trellis that can give you many years of enjoyment:
1. Select the Location
You can build a trellis supported by a blank wall or fence. It is a nice way to break up a large blank structure. Let blooming vines wind their way around and through the lattice to create a vertical garden. You can also hang interesting garden art on it and you will have a place to pause and meditate as you stroll by. If your trellis will be close to an existing structure such as a house or shed, make sure you locate it so that it is spaced at an even distance away from those features. It should be located a foot or two away from the side of a house or garage to keep plants from attaching themselves to your siding.
Your trellis can also stand alone. It may be a trellis wall for a patio space or a trellis fence. You can also build an arbor with two trellis sides to mark the entrance to a garden path.
Whatever location you select for your trellis, consider whether any part of it is on a slope. If the trellis will be on a slope, or in a low lying area, you may need to bring in fill dirt to level the site or raise the elevation. You also will need to use fill dirt to provide a solid base for any hardscaping surface such as stone or concrete block that you plan to install.
2. Determine the Dimensions
When you are planning the trellis height, recognize that the frame posts will double as the support posts. Whatever height you want, be aware that the posts you buy must be long enough to be buried deeper than the frost line. You should also leave about a foot of clearance between the frame and the ground. Finally, the posts should be long enough to bury them to at least one-third of the trellis’s total height, or the trellis will be unstable.
3. Build the Lattice Panels
 Before you install the posts, build the lattice panels and attach them to the posts. You will then be able to properly space the support posts.
To build the lattice panels, use 1” x 3” or 1” x 4” boards to build a frame for a 4′ x 4′ sheet of lattice that you purchased from a local hardware store. (If your panels will be larger than 4’ x 4’, use a circular saw to cut your lattice sheet to the proper dimension.)
Attach a 1” x 1” stop around the inside edges of the frame. Lay the frame flat on the ground. Lay a lattice sheet into the frame so that it is resting on the stops you just installed. Then attach another 1” x 1” stop around the frame on top of the lattice, which will hold the lattice securely in place but allow enough ‘play’ to where can expand and shrink with the weather. If needed, secure the lattice sheet with a few nails or screws, being sure to leave enough play in it.
4. Attach the Framed Panels to the Posts
Using galvanized nails or screws, attach 1” x 1” boards (cleats) to the inside of each post. Nail or screw the framed lattice panel to the cleats. Lay the structure on the ground and install the cleats on the other side of the panel to secure it in place.
5. Dig the Post Holes
Use the trellis structure to perfectly space the post holes. You need to decide whether your trellis will be easily moved or permanent.
If your design calls for a trellis that is only temporary, perhaps for a vegetable garden that you may change from season to season, or to enable you to relocate it easily if you decide you want the reposition it for any reason, you may be able to get by with spiked post holders. You can simply pound spiked post holders into the ground with a sledgehammer. Then you can attach the posts with nails or screws to the base of the post holders.
On the other hand, if you want to make the trellis permanent, you will need to use a posthole digger to dig holes to a depth of 30 to 36 inches. Fill the bottom of each hole with about six inches of gravel and tamp it.
 Lay the trellis on its face, with the foot of the posts right next to the holes in the ground. You may need a helper to do this part of the job. Tilt the trellis up into place. Use a level on the bottom edge of the trellis panel. Add gravel where needed to bring it up to level. Be sure to check it for plumb. Install 2x4s to the sides to brace the trellis and hold it in place. Fill the holes with concrete, leaving several inches below the surface to be filled in with fill dirt. Recheck level and plumb and adjust braces if needed. Once the concrete dries, remove the braces. Top off the holes with topsoil.
6. Apply a Stain or Paint
Protect the wood from the elements by applying several coats of outdoor stain or paint.
Contact Dirt Connections for More Information
Before you begin working on your trellis, speak to the experts at Dirt Connections. They can provide advice on how to prepare the site for your project, the types of dirt material you should use, how much dirt you will need, and schedule a dirt delivery at your convenience.


