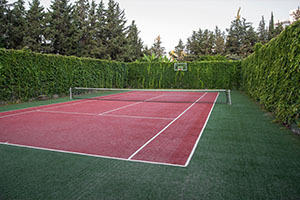
Adding a tennis court to your home is a great way to improve your home and your life. If you are a tennis lover, having your own court is probably a longtime dream of yours. You will finally be able to have constant access to a court without having to worry about hogging it by learning how to build a tennis court.
In addition, you get the added convenience of never having to leave your home to play. You can design the court to your exact specifications to optimize your playing experience. It is a big project, it is certainly one that is worth it.
Dream It Up
 The first step is to begin envisioning what your tennis court will look like, the location and other details. You should have an idea of what you want before you start to plan it out. It might be helpful to go and look at several tennis courts, both public and private.
Even courts that you have played on a lot deserve another look. You may not have paid much attention to the court itself before. Going back to look at it while you dream up your own private court will cause you to look at it from a different perspective. If you know people who have their own private courts, ask to stop by and take a look at them. Barring that, do a Google image search for private tennis courts and save pictures of the ones you like the most.
Get as many pictures as you can of the courts you liked the most and compile them together. As you get ready to start drawing up the plans, pull these out and go over them again. You are about to invest a lot of time and money into this project, so you want to make sure that the tennis court you build is your dream tennis court.
Lay the Plan
Once you know what you want, it is time to start putting together the actual plans for the court. This involves choosing the location on your property where you want it, picking out building materials, and making landscaping decisions.
You can choose between several different materials for the playing surface. Clay has become trendy because it is a softer surface that is easier on your joints, and it is a very traditional material. It can be difficult to work with. Using clay requires about five layers of different materials underneath to create a foundation before clay can be put down. In addition, clay requires constant care to avoid divots and cracks in the surface.
Asphalt and concrete are both much cheaper and easier to put in, as well as low-maintenance surfaces that can essentially be put in and left alone. However, they will be tougher on your joints.
Grass courts are also an option, but these require even more care than clay. Proper watering, fertilizing and maintenance is needed for any grass court.
Court Size
 You will need to decide exactly how much space to devote to the court. 78 feet wide and 36 feet long are the standard dimensions of a tennis court, but that does not include the out-of-bounds areas. Exactly how much room you want to add on to the court itself will depend on the amount of space you have and how much of that space you want to use.
Before you commit to anything, make sure that you actually have enough room and that you are okay with giving up that much space to a tennis court. It is helpful to mark out the boundaries of the court with stakes and string so that you can visualize how much space it will take up.
Consult with the Pros
Once you have a plan for your court, it is time to consult with professionals about getting it built. No matter how handy or skilled you might be, there are things that you will want the professionals to handle.
Leveling the Ground
For your court to actually work, the ground underneath will need to be leveled. For a space this large, this will require a small tractor. In addition to leveling the ground, the topsoil will need to be removed and the area cleared of debris that would cause problems in the building of the court.
Once the ground is level, fill dirt will need to be brought in for proper grading. You actually do not want a perfectly level surface. There should be a very slight slope in the court, with the center of the court being the high point and then gently sloping down to the edges. Otherwise, water will pool on the surface of the court and damage it.
The grade should be roughly 1 inch for every 10 feet of distance. While some people attempt this on their own, it is very challenging to get it right if you are not a professional. Often, the company that sells you the fill dirt needed for grading will be able to do the work, too.
Framing, Foundation, and Playing surface
 After leveling and grading, mark out the edges of the court and pour the foundation, which should be at least five feet thick. You will want to set the nest posts into this concrete. Once the foundation is set, pour the surface. This is not terribly difficult to do on your own, but professionals have better equipment for pouring and smoothing such a large surface, ensuring a perfect result.
Get Going
Get out there and get started on your tennis court! If you would like to speak to professionals about building a tennis court or have any question on how to build a tennis court, contact Dirt Connections today. Their contractors have experience with leveling and grading the soil as well as mixing and pouring asphalt and concrete. Once you know what you want, they can handle the heavy labor for you to produce your dream at-home tennis court.
My Premium Special Offers
For The New Standard of Excellence for DIY Chicken Coops!
Announcing: The World’s Largest Collection Of 16,000 Wood Plans
” How to Liven Up Your Home With Over
7250 Breathtaking Landscaping Designs WITHOUT Hiring Costly Professional Landscape Designers…
The Claim Buster eBook is written to help those who have been injured in a car accident, and those who weren’t injured but have a property damage claim with an insurance company.
Dirt Connections Receives Commissions For Successful Sales Transactions


