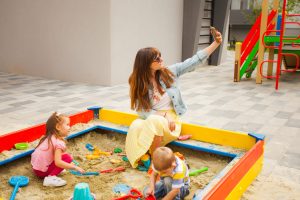
 Planning to build a sandbox? If you have children, then you understand how important it is for children to get outside and play. Otherwise, they are bouncing off the walls all night and it is nearly impossible to get them to go sleep.
One of the best ways to encourage children to play outside and exercise more is to add a well-designed sandbox to your backyard. Unfortunately, many sandboxes that are available for purchase are either too expensive or low-quality. The good news is that there is a better way. You can easily build a beautiful, well-designed sandbox quickly and at an affordable cost by following the right step-by-step process.
5 Steps to Build a Sandbox
It is easier to build a sandbox than many parents expect. It also does not take up much of your time if you do it correctly. A well-designed sandbox will have your children wanting to play outside more often, allowing them to receive much-needed exercise and sunlight. The following is a five-step process for building the ultimate homemade sandbox.
Build the frame
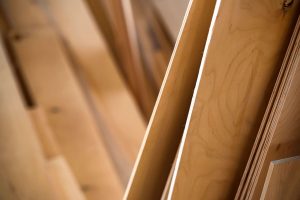
The first step in the process is to build a reliable and sturdy sandbox that is safe for your children to play in. Depending on the age and size of your child, you should put thought into the size you want the sandbox to be and plan accordingly by purchasing the appropriate materials. We recommend using 2×10 boards to create the four sides of the sandbox frame.
To create the frame, drill pilot holes at each corner of each board. This makes it easier to place the screws. You can then fasten the boards together with three-inch galvanized screws.
Make sure to line the boards up evenly without any extra extension for the desired sandbox appearance. Once you securely connect the four boards together, you should have the frame for your future sandbox. Be sure that it is secured well and there are no openings where sand can escape.
Create the cover
 You then need to create the cover for the sandbox. This involves two separate steps. The first step is to create the bottom of the sandbox, which you will fill with sand once you are finished. To create the bottom base, you will need a piece of plywood. The plywood needs to be the same size as the dimensions as the sandbox frame.
You can securely attach the piece of plywood with three-inch screws. Be sure that the plywood lines up properly with the frame and covers the entire area without additional wood hanging off any one side of the sandbox.
You will also need a second piece of plywood, which will serve as the cover for your sandbox. You do not need to attach the cover at this point in the process.
Attach the braces
Ideally, you do not want the sandbox resting directly on the ground as it can tear up the grass below. Therefore, we recommend attaching a bottom brace beneath the base of the sandbox so that it is slightly elevated. To create the braces, you will need three quality 2×2 boards (or boards that match the length of the sandbox).
You will place one board on each end of the sandbox. This will raise the sandbox off the ground once you put it where you want it. You can place the third board in the middle to provide extra support for the sandbox, which is likely to become heavy once you add the sand. Once again you can use galvanized screws to attach the braces to the base of the sandbox.
Attach the corners
This next step will require a little more work as you will need to create four triangles with a 90-degree angle to serve as the corner braces for your sandbox. You can use pressure-treated deck boards to create the corner pieces. Once you have cut the corner pieces to the optimal size, you can attach one to each corner of the sandbox using galvanized screws.
Be sure to position them in a manner that is in line with the edges of the sandbox for optimal support. The corner braces provide additional support to the sandbox frame and also make for a nice place for your children to sit as they play in the sandbox.
Fill the sandbox
 The last step in the process is to fill the sandbox with sand. The quality of the sand is important, and you should choose sand that is kid-friendly and fun to play in. Of course, you can also buy some fun beach materials to make the sandbox extra fun, including buckets, kid shovels and more.
You may also consider decorating the sandbox by painting it with your child’s favorite colors. Bright colors such as baby blue or light green typically work well with sandboxes.
You can also add an umbrella over the sandbox, creating a shaded and comfortable area that allows your child to play outside for longer periods of time. To keep the sand from getting too wet and to protect the sandbox properly, be sure to use the additional plywood board to keep the sandbox covered when it is not in use.
Consult with The Professionals at Dirt Connections
Dirt Connections offers a range of services, including assisting homeowners in the area with different residential services. If you need assistance on residential products, including concrete paving, dirt delivery and more, reach out to our team today. Our friendly team is also happy to answer any questions you may have about constructing your own sandbox today, and we can help guide you to the right materials for your project.
Our team is friendly, and we pride ourselves on exceptional service. We genuinely enjoy helping those within our community, and you can rest assured that you can get any job you need done correctly when you trust in Dirt Connections for your residential projects.


