 Growing your own fruits and vegetables can be a fantastic option to save money and ensure that your produce is fresh and organic. Considering how much time and effort goes into growing your own produce, you will want to learn how to build a root cellar to keep your fresh fruits and veggies safe from heat and sunlight.
Building your own root cellar takes a bit of time and work, but with a few hours to spare on the weekend, you can have your cellar done fairly quickly. With this step-by-step guide helping you every step of the way, you will be able to know how to build a root cellar in your backyard.
Step 1: Dig Your Hole
Now, this is a big job by itself, so you will want to get some friends or workers to help you do this. You want the hole to be tall enough for you to stand in, and wide enough to hold all of the produce you grow. A typical option could be about 8 x 8 feet, with a small 2-foot hallway space for an entrance.
Even Out the Walls
You want to ensure that the walls are even and smoothed out before beginning to lay the concrete blocks for walls, so it is best to go over the walls with a backhoe to smooth out any bumps on the walls of the hole.
Step 2: Make Your Footer
A footer will serve as the concrete foundation for your walls that will prevent sinking. These are made by digging a trench that is about 24-inches wide. Make sure that the trench is level, then begin pouring in the concrete.
Leveling
 To ensure that the concrete is level as you pour, you can stick a metal bar into the concrete to measure the level at every few feet. If you make each metal bar the same height, this will serve as a measuring tool — you stop pouring once the bar is covered — and can act as a reinforcement for the walls.
Step 3: Lay The Brick Walls
Laying the bricks for the walls of the root cellar can be time-consuming, but once you get the hang of it, you can get a steady pace going. First, you will mix the mortar for setting the bricks. The ratio for this mix is four-parts sand, one-part cement, with a small mix of mortar and lime additive mixed in at the end.
Placing the Brick
You will want to take a good glob of the mixture and plop it down on the first brick, then smooth it out a bit with your tool and place the next layer of brick on top. Continue this method, smoothing the excess off the front of the wall as you go, until the wall is complete.
Step 4: Build Your Roof
The roof of this structure cannot be flat, which would undoubtedly be much easier to create, and must be able to allow condensation and moisture to flow down the sides. This means that you need an arched roof.
How to make it:
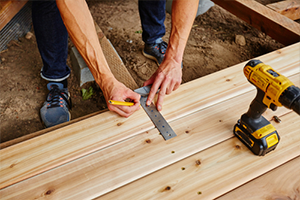
 First, you will need to assemble the frame. You will do this by laying the wood pieces in a square and connecting them together so they are squared off properly. Next, you will take slats of wood and insert them in equal sections within the frame. Make sure that these have a slit in the side that allows them to be taken out.
Where each slat is, you will take a wide piece of flat wood and cut one side so there is an arch. The piece should have one flat side and one curved side. Then, you will take each arched piece and place it against the slats in the frame so the arch is pointing up. Finally, you will attach each arch to the slat so it is secure. They will be attached the same way as the slats, by slits in the wood, so they can be removed later.
Then, you will place a piece of wood across all of the arches to connect them. Secure this piece of wood to the tops of the arches by cutting a space in the arch to hold the wood so it runs right down the middle and reinforces the arch. You should ensure that these pieces fit together, but can come apart.
Step 5: Enclose the Roof
Once you have all the wood pieces secured together, you will need to add the solid pieces to the side and top of the roof structure. To do this, you will take a large piece of pliable wood and lay it against the arches. Allow the wood to be held down for a minute to take on the curved shape, then secure it to the frame.
You will make the sides of the roof enclosure by cutting another piece of wood with the arch shape and attaching the piece to each open section on the side of the roof. This should enclose the entire roof without any areas being open to water or moisture.
Step 6: Place It On The Cellar
Once the roof is assembled, you will need to move it onto the cellar frame. To hold up the roof, you will want to install eight beams around the frame of the roof to support the weight. Then, lower the roof onto those beams and secure them together.
Tight Fit
The measurements for the roof of the cellar should be as exact as possible, and the fit should be nice and tight. The support beams should function to distribute the weight evenly and give extra support, and not just to keep the roof up. Remember, this piece will be removed.
Step 7: Putting in the Rebar
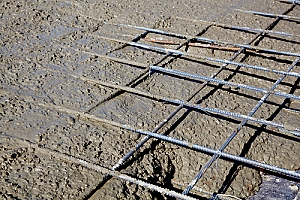
Once the roof is in place, you need to add another layer of bricks before putting in the rebar. Then, you will attach the rebar to the concrete bricks by making sure that the bar reaches inside the wall of the cellar.
How Much Rebar?
If you are unsure about how much rebar you should use, you should know that a typical 8 x 8 option will have about 18 rebars, nine used horizontally and nine vertically. This should give you the load-bearing ability to pour your concrete and have plenty of reinforcement for a long-lasting roof.
Step 8: Pour the Concrete
 Once everything is in place, you are ready to pour your concrete and create your permanent roof. If you have never done this yourself, this may be best left to the professionals, or someone you know that has experience with it. However, if you do it yourself, start slow and pour the concrete in sections.
Step 9: Remove the Wooden Roof Pieces
Now that your roof is dried and is ready for use, you can remove the fitted pieces from the inside of the cellar and reuse them for another project if needed. The pieces were made to slide together and can be taken out by removing the support beams and taking the roofing pieces apart.
Step 10: Put in Stairs and a Door
For the last step, you will want to add in a small stairway, or even a ladder, so you can easily get down to your root cellar, and a door to close it off. You can easily cut a piece of wood and add hinges and a knob, or simply buy one at your local hardware store.
The steps can be a simple staircase made from wood, or you can choose to use a ladder to get in and out if that’s easy enough for you.
My Premium Special Offers
For The New Standard of Excellence for DIY Chicken Coops!
You’re ready to reap the benefits of having chickens.
And you want to build your own coop.
But you know there are many different blueprints on the market.
So you need the right one.
And you’re eager to finally start living an eco-organic lifestyle.
Raise your own Cluck Norris and Yolko-Ono.
Have your own farm fresh eggs.
Every. Single. Morning.
But you need a simple place to start.
Announcing: The World’s Largest Collection Of 16,000 Wood Plans
Each of the 16,000 projects are detailed enough to leave nothing to guesswork, yet simple enough for beginners.
Now You Can Build ANY Shed In A Weekend Even If You’ve Zero Woodworking Experience!
” How to Liven Up Your Home With Over
7250 Breathtaking Landscaping Designs WITHOUT Hiring Costly Professional Landscape Designers…
Have you been in a car accident recently?
The Claim Buster eBook is written to help those who have been injured in a car accident, and those who weren’t injured but have a property damage claim with an insurance company.
Dirt Connections Receives Commissions For Successful Sales Transactions
Call Dirt Connections For Help
Learning how to build a root cellar is time-consuming, but the end product can be a beautiful sight. However, if you come across any issues while you are working, or need some professional help along the way, you can contact Dirt Connections to find out what services they can offer you to get your root cellar finished!


