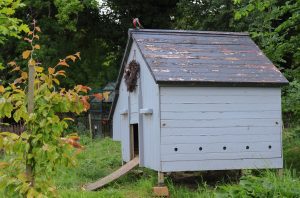
 A lean to is a creative way to build a reliable and sturdy shed at a much more affordable cost. The difference between a lean to and a shed is where the roof meets. A shed connects one side of the roof to another and meets in the middle. The roof of a lean to, however, connects to a larger building’s wall, such as the side of your home.
The cost to construct a lean to is much less, and it is a much easier DIY project than constructing an entire shed. It is great for storing landscaping equipment, gardening tools and much more. Although it is not overly difficult to build, it is important for homeowners to know how to build a lean to properly to ensure it is reliable and holds strong for years to come.
Build The Base
The best way to build a lean to is to start from the bottom and work your way up. The first step is to cut the cross beams (joists) to match the desired width of your lean to. For example, if you want to have 20 feet of space between you and the connecting wall, then cut the cross beams to 20 feet in length.
You can use a simple and safe circular saw to cut the wood. Be sure to stay safe, however, and wear protective gear and cut away from your body. If you do not trust yourself to cut the wood, then you might be able to find wood already cut to the appropriate dimensions or can have the supplier cut the wood for you. Also, it is encouraged to use treated wood. This further ensures the lean to is strong and does not collapse after several years.
After this, connect the back beams with two 2 x 6 boards of treated lumber. You can connect the cross beams with the front and back beams by using galvanized screws for each joist. Next, you will need to create the floor. You can do this by attaching four skid beams made of treated lumber and covering the frame with an inch-thick plywood.
Build The Walls

Now that the base is created, it is time to move on to the walls. You will start by creating the wall frame with 2 x 4 beams. Each beam should be cut to the same length and to the desired height of the lean to wall.
You can then attach the wall cross beams with 2 x 6 boards that are cut to the appropriate length. The cross beams should be attached at approximately 20 to 25 inch intervals. You can adjust between this range to ensure each crossbeam is properly spaced. Also, before drilling in galvanized screws, it is best to drill pilot holes to make it easier.
When building the cross beams of your lean to, do not forget to leave a place for the door. You can build the door at the size you require, although most lean to doors are around 25 inches in width.
Lastly, you will need to raise and attach the front, back and side walls. Be sure to properly position the walls before using galvanized screws to connect them to the base. Once each side of the wall is up and connected, it should properly line up and rest in a firm and durable position.
Build The Roof
At this point, you should have a level floor, durable wall and all that is left is to add the roof of the lean to.
You will first need to frame the roof. The frame should cover the entire width of the wall. You will then need to attach cross beams to the frame for additional support. It is best to add a cross beam approximately every 22 inches. Once complete, screw the frame into the lean to.
Next, you will need to measure and create the rafters. Keep in mind, the rafters will be in a diagonal pattern, so the length will be greater than the width of the lean to. Depending on the size of your lean to, you will need anywhere from 6 to 12 rafters. Be sure to attach enough rafters to securely hold the roof.
 Afterward, you will need to fit and secure the rafters of the lean to. It is also encouraged to attach collar ties from the rafters to the building for additional support.
The support beams come next. The support beams connect from the wall of the lean to to the rafters for additional support. Each lean to will need to be a different size and cut using a circular saw.
Add The Siding Panels
You will first need to cut the siding panels to the appropriate size. This is because the size of the panels will be different as each section of the lean to is a different height due to the slanted roof. Of course, the lowest side of the lean to will not need siding panels that are cut.
You can attach the siding panels using durable and fairly thick nails. A useful tip is to ensure the siding panels match the color of the cross beams of wood, although painting when finished may work as well.
Finally, you can place plywood over the roof to complete the project. You can screw it in by going directly through the plywood and into each one of the rafters. Be sure to add plenty of screws for a reliable hold and to avoid roof concerns in the future.
The last step is to paint the shed. Although this step is optional, you deserve to reward yourself with a little fun finishing touch to complete the project.
Consult With Us at Dirt Connections Today
Dirt Connections can help you with your building project, and a member of our team will be happy to answer any questions you may have. We offer high-quality treated lumber for lean to construction, along with additional resources you may need during your project as well.


