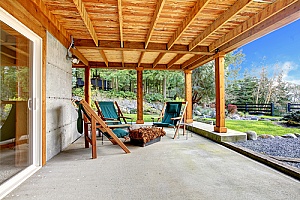
 If you want a patio that feels like a deck, or a deck that feels like a patio, consider learning how to build a ground level deck. There are a number of benefits to doing that, such as:
- It’s a good DIY project for someone with limited carpentry experience
- No need to attach it to a home or building, no need for railings
- Elevates the surface off the ground to limit problems with moisture and improve air circulation
- Great way to use a small, flat area of your lawn
Building a Ground Level Deck: Step By Step
This guide will walk you through the steps on how to build a ground level deck. Before you begin, take some time to identify the exact location for the deck. For this deck, the site needs to be very level or your deck will look awkward and it will be uncomfortable to use. If it is not level, you will need to bring in fill dirt to get it perfectly level.
Will it be shaded during the hot part of the day? Will it be a convenient location in relation to your grill? Does it have privacy from neighbors and passersby? Think about other factors that could impact the location.
Prep the Site
One of the most important steps to ensure your deck project is successful is proper site preparation. Measure the size deck platform you want and make sure it fits into the site well. Install stakes at each of the four corners and run string around them to get a sense of the size and adjust it to your liking before you start the heavy work. When deciding on the size, consider using a size that will minimize the amount of cutting you’ll need to do. For example, if the deck boards come in eight foot lengths, consider a size that is eight or sixteen feet long.
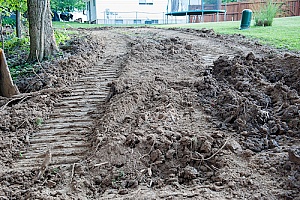 Remove all plants, rocks, and any other objects from the site. Remove the turf by first cutting it along your string lines. Use an edger for a straight cut, or use a square spade. Remove the turf from the space. Remove about two inches from the surface.
Make sure that the excavated surface is very level. An easy way to do that is to use a deck board with a spirit level on top. Use fill dirt to fill level it out and eliminate any unevenness.
Install the Support Pad
The deck can lie on the ground. Laying it on the ground is easier than pouring a concrete pads or footers. Prepare the site by covering the excavated area with a layer of weed control fabric. Then top it off with at least two inches of gravel.
Begin Cutting Deck Boards
For cutting the boards, make your work easier by using the right power saws. A chop saw will make cutting faster and cleaner than a handsaw or jigsaw.
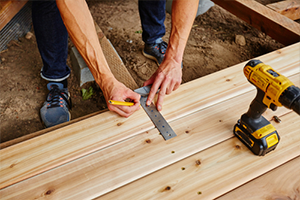
Measure and mark the deck board at the desired length, using a T-square to mark an accurate line across the deck board. Cut the boards to the desired length. If you are using composite boards, follow the manufacturer’s instructions for cutting.
Before you assemble the deck, lay out the joist frame and position the deck boards on top. Be sure to leave an expansion gap between the deck boards. Laying it out will allow you to adjust the size of the expansion gaps so that you are not left with a narrow, awkward final board or overhangs once the rest if has been assembled.
Assemble Frame
Measure your deck framing joists and cut to size.
Make two pencil marks on each end of the two outer joists – these are at right angles to the inner joists. These marks are where the coach screws will go. Make the marks to align with the center of the adjoining outer joist. You will have a total of eight marks – two in each corner of the outer joist frame.
For a professional look, use a flat wood bit to drill recesses into each of the eight marks. These should be the depth of the screw’s head and wide enough for a ratchet or socket attachment to tighten them.
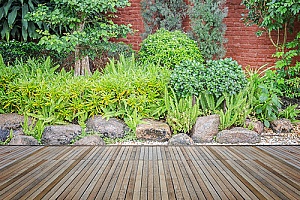 Using a drill bit that is thinner than your coach screw’s shank, you will make a pilot hold. Line up the adjoining outer joists and drill a pilot hole through the center of the recess, from the outer joists into the adjoining outer joist. This pilot hole provides a guide hole to help direct the screws and prevents the screw from splitting the wood.
Tighten the coach screws into place. You can also do this step one corner at a time.
Assemble the Inner Joists
Repeat the above step to install two coach screws through the outer frame into each end of all the inner joists.
Start in one corner of your sub-frame and position the first board across the inner joists, so that the deck board is in the opposite direction to the inner joists. The board should be positioned flush with the frame.
Lay the Deck Boards
Make sure that boards butted end-to-end end halfway across an inner joist so that both boards can be screwed into the joist for extra stability. Leave an expansion gap between the two.
Attach the Deck Boards to the Joists
Use deck screws to secure your first deck board to each joist it covers. Use two screws at each joist. Once you have the first row of boards in place, start the second row. Leave the relevant expansion gap between the boards.
You should also stagger the deck board joins across the deck for greater strength. You can also arrange them in a regular pattern for a more professional and attractive appearance.
Finish
Sand any cut ends if necessary. Stain and seal.
Contact Dirt Connections For More Information
Before you start building your deck, make sure the site is properly prepared. Consult with the dirt experts at Dirt Connections for more information about how to build a ground level deck or to schedule a fill dirt delivery.
