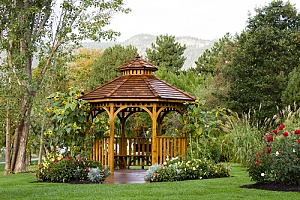
 Gazebos make gorgeous statement features in any backyard. While they may look complex, they’re remarkably simple to build on your own. Building your own gazebo allows you to customize the size, shape, and height of the structure, ensuring that you end up with the perfect style and fit for your yard. Here’s how to build a gazebo and transform your yard.
Leveling and Grading
Before you begin building, it’s important to level the land on which the gazebo will be built. This creates a stable foundation for the structure and also ensures that it will be built on ground of the same height to avoid slanting floors. Fill dirt is an excellent tool in this process. The dirt is made up of fine particles and has little to no organic matter. It is therefore easily spread and compacted to create a stable base. You can get fill dirt from local contractors and construction firm, many of which will assist you in selecting the right amount of dirt for your needs. Once your land has been leveled and graded, you can begin building your gazebo.
Materials
The exact materials needed for your gazebo will depend on the plans and design you select. Simple gazebos may only call for wood and fasteners, while more decorative options might require shingles, trim, and other finishing touches. Generally, you will need plywood wfood for the walls and supporting beams, metal bars, large screws or nails, concrete, a shovel, and a power drill. Consult the plans you have selected for exact requirements.
Preparing Your Yard
Begin building your gazebo by marking the shape of the structure on the grass. Then, dig holes for the posts. You will need at least four posts, though more may be required for circular, octagonal, or particularly large gazebos. Level the posts within the holes and use cement to anchor them, making sure that the posts remain straight and at an equal height. The cement should fill about two thirds of the hole so that the top can be covered with dirt and grass later for a seamless look.
You can now begin building the base. Pour concrete within the area created by the posts and allow it to set before continuing. You may choose to dig a shallow channel in between each post to keep the concrete in the proper place. Some homeowners choose to add tile or other decorative flooring to the concrete before it sets.
Building the Gazebo Structure
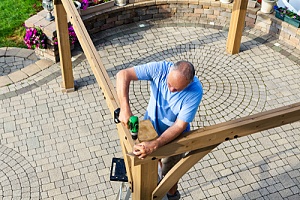
 Next, mount the bracing beams around the closed sides of the gazebo. The beams should be placed perpendicularly to the posts, with two on each side for a square gazebo. Secure the beams with large bolts placed through the center of the posts. It may be helpful to pre-drill the bolt holes and have one person hold the beams while the other attaches them to the posts.
At this point, you can insert windows if you would like. Position the windows within the frame you’ve constructed and mark their width. Create a frame for the window and nail the frame into position before fitting the window in and securing it with nails on either side. Make sure that the nails protrude from the top by about a quarter of an inch, which will help keep the window in place. Seal with wood glue or caulk.
Whether or not you add windows to your gazebo structure, you will need to add more beams to join the posts at the top. Cut a small square into the ends of each of these beams, then fit them over the posts to create a splice joint. Glue these pieces together and reinforce them with bolts placed through the beams and into the posts.
Attaching the Roof
After the base structure is built, you can begin installing the roof of your gazebo. Cut a 45 degree angle into one end of each of four beams. Attach the flat ends of these beams to the ends of one longer beam to create a roof structure with a triangle on either side. Bolt the roof to the corner posts to secure it to the rest of the gazebo.
Be sure that the bolts are not too long, as they may go through the other side of the post if they are not the proper size. To cover your roof, add corrugated aluminum or fiberglass with nails. Attach shingles for an old-fashioned look, or insert curtains for a more modern and ethereal style.
Completing Your Gazebo
Finishing touches make a gazebo something special. You may decide to paint it colors that match your home, or simply varnish the wood to protect it while showing off its natural grain. Many gazebos are open structures, while others have walls. Install and paint drywall or wood walls, or attach more curtains to continue the fairytale theme.
 Depending on the size of your gazebo, you may be able to fill it with planters, outdoor furniture, string lights, and other elements to personalize the area.
Starting With Fill Dirt
Fill dirt is an essential element of gazebo construction. Without this crucial first step, you may put in hours of hard work only to find that the ground slants and the posts are uneven. Fill dirt helps prevent this by creating level land for your project. Contact Dirt Connections for more information about fill dirt and to schedule a consultation regarding your Maryland fill dirt delivery. Dirt Connections provides free consultations to help you calculate the right amount of fill dirt for any residential or commercial building project. You may also qualify for free fill dirt delivery. Once your project is complete, Dirt Connections can remove any excess fill dirt and leave your yard in perfect condition after.


