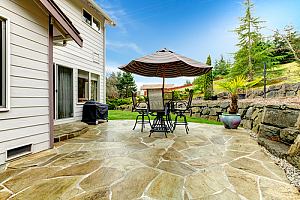
 A concrete patio is a great way to make your home more attractive and to add value to your home. For DIY homeowners, constructing your own patio is possible, although it will require proper planning and having the right resources. Before beginning, keep in mind that a patio is hard (and expensive) to remove, so if there is any doubt in your ability to complete the entire process, you may want to consult with professionals for additional assistance.
With that said, building a patio for your home yourself is not all that intimidating as long as you understand the proper steps to take, have all of the necessary tools and resources and have help available to you for portions of the project that require two people.
This guide is intended for DIY homeowners and contractors who are looking to build a small- to mid-sized concrete patio. It is important to consider the specific details of your project as each job is unique, but the following should provide a general guideline on how to build a concrete patio.
Measure How Deep You Need to Dig
The first thing you will need to do is measure how deep you will need to dig. This is an important step as achieving the proper depth plays an essential role in the final appearance of the concrete and how well the patio holds up over time.
We recommend aiming for between 4 and 8 inches of thickness for the concrete. The thinner the patio the less it is able to hold weight without cracking or leading to other concerns. Therefore, if you plan to use your patio for practical purposes such as a poolside attraction that has a hot tub, you will need a thicker patio.
What Tools Are Needed
 The tools that you will need for the project depend on the specific details of the project. Larger projects may require a more extensive list of tools, whereas simpler projects may not require as many. However, the tools you will need for the process laid out below include:
- Compacting machine
- Isolation joints
- Gravel base
- Concrete solution
- Flat shovel or hoe
- Wood float (for curing)
- Edger (for finish)
Once you have all of the proper tools and materials, you can begin the patio construction process.
Planning How Much Concrete You Need
Once you determine how deep you need to dig and gather the necessary tools, you can start planning how much concrete you need. The worst thing that can happen is to find out you do not have enough concrete after you start laying it. On the other hand, too much concrete can lead to increased cost or making the patio thicker than desired.
When determining how much concrete you need, consider the width and depth of the patio. You should also take into account the amount of gravel base you intend to use. Many construction professionals recommend using the same amount of concrete as you do gravel for a half and half solution.
Pour Gravel Base
While you determine how much concrete you need, you should also consider how much gravel is necessary. As mentioned, the same amount of concrete as gravel is often recommended. Once you are ready, you can start by building and installing the forms. Be sure to allow for a slight run-off of rainwater as standing water may cause concerns.
 Once the forms are in place, you can pour the gravel base. Most patios require between 4 and 6 inches of support from the gravel base. Using the 50-50 rule, you should use the same amount of gravel as you do concrete. This means if you intend to use 4 inches of concrete, you should also use 4 inches of gravel base. Lastly, compact the gravel base with a reliable compacting machine.
Set Up Slab Dividers
The next step is to set up the slab dividers. The slab dividers play an important role in preventing cracks and other types of damage as the weather changes throughout the year. You can set up the slab dividers by placing isolation joints. Isolation joints separate different sections of your patio. Not only do they offer long-term benefits in keeping your patio damage-free, but they also can help you remain organized while pouring the concrete.
Pour Concrete
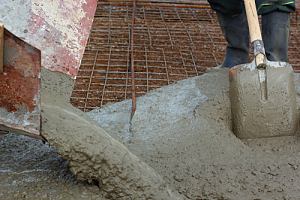
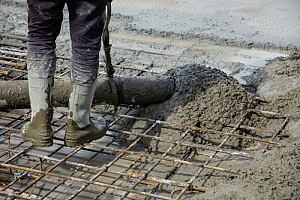
After you have the dividers properly set up, the gravel base has been placed and compacted and you have the right amount of concrete solution, then you can pour the concrete. Be sure to lightly dampen the gravel before laying the concrete.
It is also best to start at the corner of each form and pour slowly. This is a two-person job and you should have someone else spread the concrete solution with a flat shovel or a hoe while pouring. When spreading the concrete, be sure to do so carefully as to not stir up any particles on the bottom that may compromise the appearance of the finished product.
Smooth and Let Solidify
The last step in the process is to smooth out the concrete solution and allow it to solidify. As mentioned, it is important to be careful while smoothing the concrete as you lay it. This is because elements in the gravel base can get stirred up and affect the appearance of the finish. Once the concrete is smooth and spread out evenly across each form, you can then let it sit and solidify. You can leave the forms in while the concrete cures. After several days when the concrete has cured, you can remove the forms and apply the proper finish.
Contract the Pros at Dirt Connections
You can learn more about how to build a concrete patio by reaching out to our expert team at Dirt Connections today. We have experience helping those in our local community build beautiful home patios that makes their home look better and adds outdoor comfort. We are available via phone or email, and we are happy to answer any questions you may have.
Summary

Dirt Connections was started with one goal in mind: providing quality residential and commercial construction services to clients on time and on budget. Reach out for more information on how we can support your next project.
For your convenience our estimates are free and by appointment. Call 703-940-9949 for a free estimate today!


