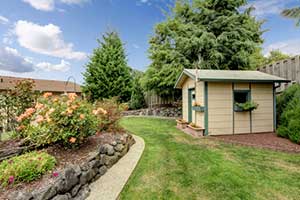
 One of biggest challenges that can be overlooked when it comes to building a shed in your backyard, is where it’s going to go. You need to consider if you want the shed to be close to your home if you want it out of the way so you have the most backyard space if the ground is flat, and if there are any tree or other objects that you’ll have to work around.
It’s also important to take into consideration if your backyard has any rainwater flooding problems. If you’ve noticed areas of your yard collecting water, this probably isn’t the best place to put your backyard shed.
Leveling The Land With Maryland Fill Dirt
Once you have decided where to place your shed, it’s very unlikely that the ground is perfectly level. This means you’re going to have to put some work into making sure your shed has a flat spot to sit on. The best material you can use as a base to make sure your shed is sturdy and stable is Maryland fill dirt.
Maryland Fill Dirt is used for many construction purposes. In fact, it might even be what was used to help create the foundation of your house. Fill dirt can also be used for highway maintenance, filling inground pools, and land grading – so you know it’s a reliable material. Fill dirt is vastly different from the dirt that is already in your backyard. This is because the dirt in your yard contains what is called organic matter. This organic matter is what helps support the growth of your grass, but is what also makes it unsuitable for leveling the ground where you shed is going to go.
 Organic matter breaks down over time, and as it does the volume of the dirt changes, which can result in shifting of the dirt. Shifting of the dirt could cause shifting your shed to move. Fill dirt is taken from below the top layer of dirt so that it contains no organic matter. You know this for sure because your Maryland Fill Dirt Contractor will have screened it to ensure no organic matter is present.
Fill dirt lacks organic matter, so it can be tightly compacted and you can trust that it’s going to stay sturdy and stable. For more information about residential construction projects and to schedule your Maryland Fill Dirt Delivery, reach out to a Maryland Fill Dirt Contractor.
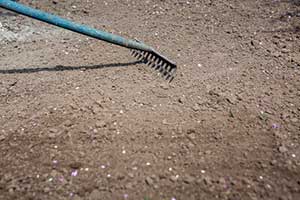
To create level ground you’re going to have to determine what height is “level”. Then, you have to cut away any dirt that is above your level height. Following this, you fill in any low points with fill dirt so that they reach the level height. Next, you’re going to take fill dirt and cover the entire area the shed is going to be resting on. A good inch or so of fill dirt should do the job. Following placing down the fill dirt, you need to compact it. There’s nothing fancy about this step, you can do it with your hands and feet if you want. Or you can get a flat wood board to lay down overtop the dirt and apply pressure. The board will help you to cover more area in less time.
Building The Foundation
 Now that you have the flat land your shed is going to set on, you’re going to want to start building the foundation. You could use material like cinder blocks, bricks, or wood – but, cinder blocks are highly recommended. Using cinder blocks as a foundation to raise up your shed can help keep rodents out, and will not harm any tree roots that may be in the area.
Place the cinder blocks around the perimeter of where you want your shed to be. You can fill in the perimeter of the foundation with either Maryland fill dirt, more cinder blocks, or wood. If you use cinder blocks, It’s strongly suggested that you pour concrete over the cinder blocks to make sure there is no risk of them moving or shifting. Be sure to make sure that all of your cinder blocks are placed down level because otherwise, it will affect the main structure.
Building The Frame
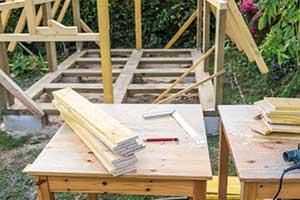
Now, you can begin to build the structure of your shed. The frame is very important for supporting the roof, so don’t rush through this step. You’ll most likely want to use 2×4’s for this, but you can use any wood you’d like. Focus on one wall at a time making sure to create the outline of the wall and placing in support beams.
Creating The Base
 Next, you’ll want to cover the entire base. You could use materials like concrete or limestone aggregate. After this, you’ll need to create a base that you can nail the frames of the wall too. Place your wood boards (2×8’s recommended) on the cinderblocks exactly where you need it to be. Use a clamp or some tape to hold the board in place while you’re drilling.
Start by drilling a hole into the wooden board near the end with a masonry drill. Keep drilling through the board and into the concrete. It’s important that you pull the drill out every few seconds while you’re drilling to empty out the wood and concrete dust. Next, insert two nails side-by-side into the opening with their ends even. Drive the nails into the wood as firmly and as straight as you can. Keep going until they are sunk all the way into the board. Continue to do this along the board to ensure that it is firmly attached.
Attaching The Walls
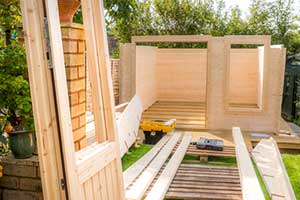
Now’s when the shed is finally going to start coming together. It’s a good idea to place all of your walls on the frame at the same time and hold them together with clamps or some tape so that you can ensure the frame is square before you nail it firmly in place.
Finishing Touches
The simplest roof you can build for your shed is going to be a pitched roof. A pitched roof slants in only one direction so it will be simpler for you to build, but still allow for proper rainwater drainage. Finally, you’ll want to attach siding and shingles to your frame. This is also when you’ll want to add any additional features like a door or windows. Upon finishing this task, you have successfully completed building a backyard shed.


