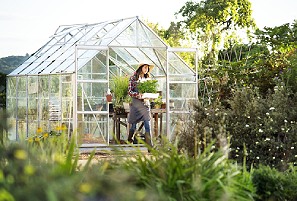
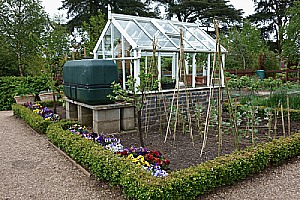
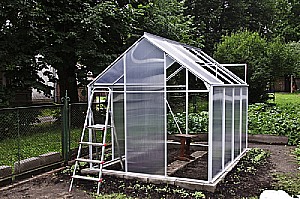
 Thinking of building a greenhouse in your backyard? You can search online and find hundreds of plans and ideas for a greenhouse of any size. You can find plans for building a greenhouse using a broad range of materials. There are plans for beautiful greenhouses made of lumber, PVC, discarded windows, plastic sheeting, and even empty plastic water bottles.
Fresh Flowers and Vegetables All Year Long
No matter what material you decide to use, you will want to make sure you build it on a solid base. You need a base that is level, but properly prepared and graded so that it does not flood, hold water, erode, or grow weeds. A properly built base (with an accurately leveled foundation) is one of the most important keys to the success of your greenhouse project.
Learn how to build a backyard greenhouse for your back-garden below:
1. Decide on your location and size of the greenhouse
A greenhouse should be located far from trees and buildings and in a place where it will get sunlight for most of the day. If you do not have such a sunny spot in your backyard, select a spot that at least gets adequate morning sun. Aim to position the greenhouse to take maximum advantage of the available sunlight.
The location also will likely be a factor in your decision on your greenhouse size. Obviously, the location must be large enough to accommodate the size of the greenhouse you want.
2. Level the site
 Once you have identified the best location in your backyard, prepare to do any necessary levelling, grading, and excavating for the building pad of the greenhouse base. Consider whether you need to call in the help of a dirt contractor with heavy equipment to help you with this part of the project.
If you are building the greenhouse on an area of your yard that slopes, you will need to first level the slope. Depending on the severity of the slope, you may need a professional with the proper heavy equipment to do it right. Moreover, to properly (and safely) level the site, you will need to bring in fill dirt to fill in and build up low areas.
Correcting a steep slope requires more fill dirt than a milder slope. Clean fill dirt, that is, dirt that is free of organic material concrete chunks, and miscellaneous debris, is not terribly expensive. It will enable you to fill areas of erosion and stabilize the ground.
Keep in mind: while fill dirt is relatively inexpensive, the labor and heavy equipment needed to correct the slope is not. Areas with deeper and large gradients require more resloping to create a flat area, and thus more labor. As a rule of thumb, the steeper the gradient to fill, the more you’ll have to pay. A hill with a gradient of 14% would likely cost twice as much to level as one with 7%. Furthermore, if the area is subject to significant erosion, it may require more grading to keep the soil in place. Each regrade can add further costs to your project.
3. Build the greenhouse base
 Use 4×4 pressure treated lumber posts. Cut two to pieces 10’ long each for the width and two pieces to 14’ feet long for the length. Join them at the corners by cutting notches, or tabs, in the ends and fitting them together so that the tongue of one post fits into the notch of the adjacent post. Fitting them together like this will give the greenhouse durable support. Once the rectangle base it laid out, use a level to ensure the base is level. Also, measure the diagonals of the rectangle to ensure that the corners are properly right-angled. Secure the joints with screws.
Anchor the base into place by driving several 2×4 stakes that are 24” long into the ground around the outside perimeter of the base. Then drive several screws through the stakes into the base once the stakes are well-positioned.
4. Build the walls.
Use 2×4 studs to assemble the wall on the ground. Cut the 2×4 to the desired wall height (6-8 feet). Attach them to the bottom and top plate, spacing them about 22 inches apart. Drive 2- 1/2” screws through the plates into the 2×4 studs. Stand them up and attach them to the base by driving 3- 1/2” screws through the bottom plates into the wooden base. Use a level as you go to make sure the walls are vertical and lock them in place using 2×4 braces. Secure the walls by driving 3-1/2” screws through the bottom plate into the wooden base.
On one of the short walls, leave a space for a three-foot wide door.
5. Install the roof rafters.
 Use one 2×4 as the roof ridge. Attach it to the top plate using two studs on screwed on to each end. The studs should be cut to the length necessary to give your roof your preferred height and pitch. Depending on the roof pitch, cut the lengths of 2x4s needed with ends mitered to the angles you need. Use screws to attach the rafters into the top plate.
6. Build and install the door.
Use 2×3’s and a framing square to build the door with right angled corners. Drive in several 4” screws at any corner. Cut the vertical supports at 69″ and the horizontal components at 36″. Drill pilot holes through the horizontal supports and insert 2- 1/2″ screws into the vertical supports.
Use three hinges to lock the door into position. Plumb the door and then insert the screws. You should also install a latch to secure the door in a closed position.
7. Cover the walls and roof.
Cover the roof and walls with translucent polyethylene sheets. Use a staple gun to attach it to the studs.
Contact Dirt Connections for More information about Fill Dirt
Interested in constructing your own backyard greenhouse or a similar backyard project? Need fill dirt for that level foundation? Contact the dirt and foundation experts at Dirt Connections. They will assess your yard and project goals, answer any questions or concerns, determine your needs, and assist you in scheduling a free fill dirt delivery for your backyard project. Don’t hesitate to get them a call today!


