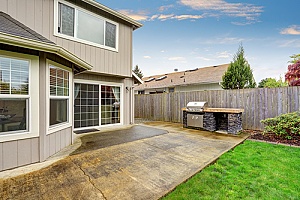
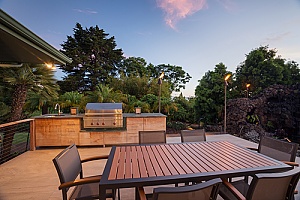
 An outdoor grill island takes a backyard barbecue to a new level of greatness. A nicely built island with a grill makes the grilling process convenient, fun, and downright stunning. Build it with quality materials that blend in with your home’s exterior and it can even add to the resale value of your property(!). Of course, aesthetic appeal and craftsmanship are not the only considerations you need to make when building a backyard BBQ island. You need to think of safety, too, and that means building it on a solid foundation.
Building the Backyard BBQ Island Step by Step
Here are the steps to building the backyard BBQ island you really want:
1. Choose the Design and the Site
A backyard BBQ island needs a solid base. If you already have a patio, make sure it can handle the size and weight of the island you want. An aging patio may need to be rebuilt to safely accommodate the island. That is particularly important if your plans include an outdoor kitchen with appliances, counter and cabinet space, and so forth.
If you do not already have a paved site for the grill, you will need to build a proper foundation for it from scratch. The steps are similar to those required for building a patio. Keep in mind that if your site is in a low lying area or on a slope, you will need fill dirt to make the base solid and level.
Moreover, any site limitations you have will help dictate the island design. Certainly the size will be a factor, along with your budget. If you plan to build it yourself, think about the materials you will use. Will the frame be cinder block, steel, or wood? Do you have the skills necessary to do it all yourself? If you have any doubts or concerns, or do not know how much fill dirt you will need, consult with a reputable fill dirt supplier in your area for advice.
2. Build the Foundation
Whether you enlarge or rebuild an existing patio to serve as the foundation for your grill, or you install a new pad elsewhere in your yard, you will need to create a solid base. A solid base is the key to long term success of your project.
Start by measuring the size of the area you need and stake it. Call Miss Utility to make sure you will not end up digging into underground structures or cables. Also, check with your local government authorities and HOA to get any permits or approvals that may be required.
 Also, remember: you need a concrete pad to support the backyard BBQ island. A paver pad is not ideal because it will sink over time under the island’s weight. The concrete needs to be at least four inches thick.
3. Construct the Frame
You have several options for building the island frame. The safest materials to use are cinder blocks or steel or aluminum studs. These materials can withstand much higher temperatures than a wood frame. A metal frame can be assembled in the same fashion that a wood frame is constructed, but using screws or welding to join them.
Another wonderful option is modular concrete panels. The manufacturers try to make their panels as lightweight as possible without sacrificing durability and solidness. The advantages to these panels are many: the manufacturers will do all the cutting for you and ship them to you ready for assembly. You assemble them with special glue, not cement. Moreover, these are very affordable and can withstand fire, nature, and decay.
Building a frame with lumber is the cheapest way to do it. Wood frames for a barbecue grill have significant issues. A wood frame is subject to deterioration, and it will dry out and break down over time due to extreme heat radiating from the grill. Steel studs are much better, with one drawback being they are prone to rust if your home is in a humid area or is near the ocean. Moreover, they will require extra studding to support the high amounts of weight. A large stone or concrete countertop, after all, will likely require extra support.
Cinder blocks, fortunately, do not have the same limitations. Yes, the are heavy to maneuver but they are fairly easy to use if you work with the dimensions of the blocks to limit the need to cut them. Concrete panels are even heavier, so you will probably want help moving them around. Using these materials for curved designs may require professional help. Additionally, they are also difficult to cut even if you need to make small cuts to adjust things. Still, block and concrete are the most durable materials for framing a grill island and they can withstand almost any amount of heat or weight.
4. Apply Cement Board to a Metal or Wood Frame
After assembling the frame, apply cement board such as Hardibacker or Durock onto the frame. If you build a cinder block or concrete panel frame, you will not need to use cement board.
5. Install the Counter Top
 The top is covered with counters. You can use any material suitable for outdoor living. Stone such as granite is popular, and concrete is another great option. If you use granite, you will likely need the help of a professional installer. The countertop should overhang the frame top by about 3 inches on each end and on the cooking side. If you will have seating on one side, provide for an overhang of about 12 inches.
6. Install the Hardware
Ready to install the grills, cabinet doors, and physical hardware? Now is the time.
7. Apply the Veneer
Last step. You got this. If you use cement board sides, cover it with the veneer of your choice – stucco, stones, tiles, or a combination. Follow the manufacturer’s instructions for proper application.
Contact Dirt Connections For More Information
Questions? Concerns? Doubts? Issues? Before you start work on your breakthrough backyard BBQ island, make sure to consult with an experienced fill dirt and backyard construction professional who can provide you will expert-level knowledge and guidance for your project. Better yet, give us a call at (703) 940-9949 or contact Dirt Connections online today. We are happy to provide recommendations, share our expertise and will even schedule a free dirt delivery on us!


