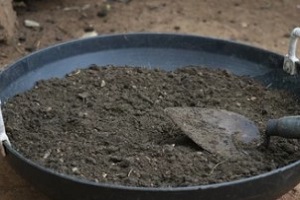
 One very important step that many people overlook when they are setting up a garden is sterilizing their potting soil. Soil can harbor diseases and pests, not to mention the seeds of pesky weeds that could crop up later and threaten the garden.
Therefore, for the most optimal plant growth and health, it is essential that you ensure you are beginning with sterilized garden soil or you could compromise the results of your project.
How Can Potting Soil Be Sterilized?
If you do not wish to purchase sterile potting mixes from garden centers, sterilizing garden soil at home is not particularly complicated and is especially useful if you already have soil in your yard that you would like to use.
Here is a look at some of the most common methods of sterilizing soil for seeds and plants.
Sterilizing Potting Soil Using Steam
Steaming is the preferred method of sterilizing potting soil at home, and there are two ways that it can be accomplished: with a pressure cooker or without one.
If you choose to sterilize your potting soil in a pressure cooker, you will want to place several cups of water into the cooker and then set shallow pans of level soil on top of the rack. Ensure that the soil is no higher than four inches deep and cover each pan with foil.
Then, close the lid while leaving the steam valve open just enough so that the steam can escape; when that happens, it is time to close the pressure cooker and heat the soil at 10 pounds of pressure for 15 to 30 minutes.
There is an important caveat here: be very careful if you are sterilizing nitrate-rich soil with pressure as there is the potential of creating an explosive mix. The same is true of manure.
If you do not wish to use a pressure cooker for this process, you can use a sterilizing container. Pour around an inch of water into a sterilizing container and place your soil in foil-covered pans on a rack over the water.
Then, close the lid and bring the water to a boil, leaving it open only enough to stop pressure from building up. When the steam escapes, leave it to boil for 30 minutes and then allow the soil to cool.
No matter which approach you choose, you want to keep the foil on the soil until you are ready to use it.
Sterilizing Soil In The Microwave
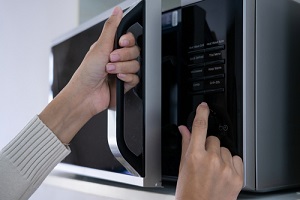
 If the other options will not work for you, you may be able to sterilize your soil in the microwave. Simply fill a clean, microwave-safe container with moist soil. In this case, you will not want to use any foil.
Many gardeners recommend using quart-sized containers with lids, making sure that the lids have a few holes for ventilation. You should microwave the soil for around 90 seconds for each couple of pounds at full power. If your microwave is bigger, you may be able to sterilize several containers at once.
When the time is up, remove the containers from the microwave and place tape over the vent holes. Leave them sealed until you are ready to use them.
If you do not have microwave-safe containers, you can sterilize a small amount of moist soil in propylene bags. Leave the top open for ventilation and heat your soil for two to two-and-a-half minutes using full power. Then close the bag and let it cool before removing it from the microwave.
Sterilizing Potting Soil With An Oven
If you do not need to sterilize a significant amount of soil, you can use your oven for the task. In an oven-safe container, such as a metal or glass baking pan, place soil around 4 inches deep and cover with foil.
Bake the soil at 180 to 200 degrees Fahrenheit for at least 30 minutes, using a meat thermometer to check its internal temperature. Once the soil has reached 180 degrees Fahrenheit, remove it from the oven. Allowing the temperature to get too high can also produce toxins, so it is important to pay attention. Leave the foil on the soil until you are ready to use it.
Ventilate The Area
When you sterilize potting soil indoors, it is going to cause the room to fill with an earthy odor. Although some people can tolerate this smell, others find it to be quite unpleasant, so it is a good idea to open the windows in the room and turn on a fan before you start sterilizing. As long as indoor air is circulating with outdoor air, the smell will not linger for very long.
Do Not Forget To Sterilize Your Containers
Keep in mind that containers should also be sterilized before you add your sterilized potting soil to them. Containers that were previously used and not cleaned properly could be harboring insects, fungi and soil-borne diseases.
Buying Sterilized Potting Soil
 Sterilizing your own potting soil is a very cost-effective way of ensuring you are beginning any gardening project with healthy soil. However, if you are unsure about the process or have a bigger budget, you could consider buying a clean, sterile potting mix for all of your seeds and transplants to save some time and give you greater peace of mind.
This is a particularly good option if you need a significant amount of soil as it can take a long time to sterilize it in the small batches used for most at-home sterilization methods.
Keep in mind, however, that store-bought soil that is labeled as being sterile could be compromised if the bag has been punctured, was mishandled, or has been sitting on the store shelf for a long time.
Get In Touch With The Soil Professionals
If you need soil for gardening or other projects, get in touch with Dirt Connections to find out more about the different types of high-quality soil we offer for delivery throughout the Northern Virginia area. Our professionals can advise you on the type and quantity of soil you need for whatever purpose you have in mind.
Summary

Dirt Connections was started with one goal in mind: providing quality residential and commercial construction services to clients on time and on budget. Reach out for more information on how we can support your next project.
For your convenience our estimates are free and by appointment. Call 703-940-9949 for a free estimate today!


