 A sump pump is a great way to keep water out of your basement and prevent your home from experiencing water damage. Installing a sump pump is a fairly complex process, but DIY homeowners who wish to install their own sump pump can do so by following the correct process.
The following are step-by-step directions about how to install a sump pump. For the DIY project, you will need to purchase a sump pump along with various tools. In total, you can expect to spend approximately $500 on the project, though installing a sump pump may end up saving you more than that by protecting your home from water damage that can cost thousands.
Be sure to give yourself enough time to complete the project as there will likely be issues that arise throughout the process. It is recommended to complete the project as soon as you start it as possible, as opposed to breaking the project up over several days.
Check Your Local Regulations
Most local and state governments allow homeowners to install a sump pump with little to no regulations. However, it is still important to check with your local municipality to see if there are any restrictions or regulations.
Rarely will a sump pump not be allowed, although there may be certain regulations on the type of sump pump installations. For example, many local governments have regulations in place on certain actions related to the sewer system. By understanding the local regulations before you begin, you can ensure you properly plan the installation process and avoid as many roadblocks as possible.
What You Need to Install a Sump Pump
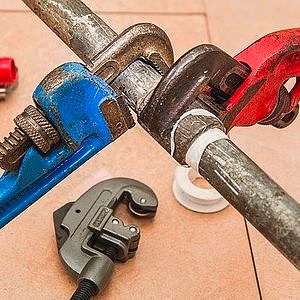
 As mentioned, you can expect to spend approximately $500 in total for the sump pump and various tools that you will need for the DIY project, along with the majority of one weekend to complete the project. The tools and materials that you will need to install a sump pump include:
- Sump pump
- Shovel
- Loose gravel
- Electric drill
- Hose clamps
- Pressurized fittings
- Rotary hammer/hammer
- PVC pipe
- Sealant
Be sure to check the manufacturer’s instructions on how to install the sump pump. The additional materials you will need may vary depending on the brand that you choose. It is important not to try and skip steps in the installation process, as this can cause more problems than it solves.
Choose an Optimal Location
The first step is to find the best place to install your sump pump. There are two priorities to keep in mind when choosing the optimal location. First, the sump pump must be placed near where the majority of water collects in your basement or crawl space. This is important for ensuring the sump pump works properly and collects excess water appropriately.
Secondly, you will need an outlet to plug the sump pump into. If you do not have an available outlet in your optimal location, then you may need to have an electrician install a ground fault circuit interrupter (GCFI) outlet.
Dig a Hole
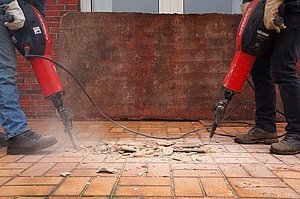
 The next step is to dig a hole to create the space needed to place the sump pump into. The difficulty of this step depends on whether you are placing the sump pump inside of your basement or inside a crawl space. For a crawl space, you will only need a shovel, whereas you may need an electric jackhammer to break the basement concrete.
Be sure to give yourself approximately six inches of additional space below where the sump pump will be placed and make the width ten to twelve inches wider. You can then fill the hole with three inches of loose gravel. Smooth and level the gravel after pouring.
Set the Pump and Fill Gravel
Your sump pump should come with specific installation instructions. If so, be sure to follow the instructions closely, as each sump pump may vary slightly. If there are no specific manufacturer directions, then you can proceed by laying the sump pump into the hole and properly positioning it so the width is even on all sides.
After placing the sump pump, you can continue by pouring more gravel into the hole around the pump. There should be approximately two inches of space left at the top after you pour the loose gravel.
Connect Pipe and Drainage System
You will then need to attach the adapter to the PVC discharge pipe. Be sure to use strong glue for a secure hold. Next, create a quarter of an inch hole approximately six inches above the pump with a drill. This is important for allowing the sump pump to be primed when it is not in use. You can then install the check valve to the outlet of the pump. You may need to use hose clamps for this installation step.
Finally, you can create the drainage system. We recommend using pressurized fittings and one and a half-inch PVC pipes for the draining system. Be sure to lead the water away from the house. The PVC should lead outside, ideally through the wall. If you need to create a hole in a brick wall, then you may use a rotary hammer.
Use sealant around the PVC pipe that leads outside to ensure the home is properly waterproofed. You will also need to attach an increaser to the PVC pipe to ensure water is moving away from the foundation of the home. Finally, you can cover the sump pump and place gravel around the perimeter of the corrugated pipe to keep it securely in place and protected.
Consult With the Experts
You can learn more about how to install a sump pump by giving our professional team at Dirt Connections a call today. We can answer your questions and help you decide whether or not you should choose professional installation. Call us today with any questions or to ask about professional installation services.
Summary

Dirt Connections was started with one goal in mind: providing quality residential and commercial construction services to clients on time and on budget. Reach out for more information on how we can support your next project.
For your convenience our estimates are free and by appointment. Call 703-940-9949 for a free estimate today!


