 A sauna is an interesting way to turn a spare room into a health spa that will assist in lowering your blood pressure and providing relaxation. Although you may not have thought about building a sauna, this could be a great addition to your home if you have an existing room that you’re not quite sure what to do with.
Making a room safe for a sauna takes a bit of work, but if you love the idea of building a room into a sauna you, your friends or family to use, a sauna is a good project for you to turn an empty room into a place for relaxation.
If you’re interested in what it takes to build a sauna in your home, then read through this article to find out where to get started, and what you will need to get the job done. You should refer back to this article when building for any questions or concerns along the way. So, let’s get started.
Safe Wiring for Heat and Moisture
The first thing you will need to do is wire the room for proper heat and moisture safety. You will need lighting, but you want to make sure that the wiring you use is the right kind for this type of environment. The most common wires used for saunas that have a decent amount of power are 8-3 and 12-3.
When doing the wiring for an indoor sauna, you will run your wire through the studs directly to the heater. You will also want a sauna heater wire conduit, which is typically made of rubber and will be impervious to heat and moisture.
Adding Insulation and Foil to Lower Costs and Up the Temp
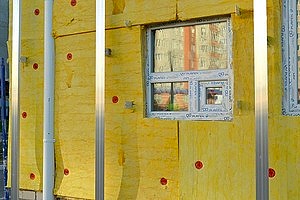
 If you haven’t already done so, remove any drywall and get your walls down to the bare studs. Then, you will want to add insulation that will keep the heat in the room and help get the temperature higher for better results. You will want to use R-11 insulation for the interior walls of the sauna, and R-19 for exterior walls. This will keep the heat in and the noise from the house out.
Adding foil to the room is another layer of protection that acts as a barrier against vapor. This will help protect your walls from absorbing any moisture from the steam. This also prevents the steam from seeping into any other areas of the house, which could cause damage.
Follow Mounting Guidelines for Your Specific Heater
Depending on the specific model of the sauna heater that you purchase, you will want to install the unit according to the instructions that the model comes with. Each sauna heater has an instruction manual that will detail how to install it properly, and following those instructions will ensure that the exact model you get is installed correctly.
The mounting of the heater will also be detailed in the manual, so you will know how high off the ground the heater will need to be. Some heaters require a vent underneath or behind the unit, but others will ask for a large gap from the bottom of the door. Follow the instructions for your specific heater exactly.
Also, if you are mounting the heater in an area where there is foot traffic, you will want to put up a guard rail around the unit. This will prevent you and your guests from walking into or bumping the heater, which could be very hot, and getting burned.
Adding Rocks and Benches for Max Absorption
Rocks
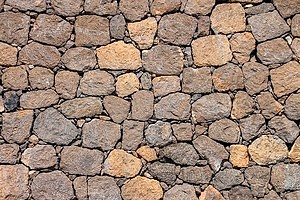
 Vulcanite rocks will need to be placed in the sauna room. Before you begin this step, you will need to wash them. Any dirt or dust on the rocks could burn up while the sauna is on, which will give off a bad smell.
Vulcanite rocks are used in saunas because they give off the radiant heat that you feel when you are sitting in the room. This soft heat is what you feel, and what gives you the relaxing heating feeling instead of a burning sensation. The rocks are laid around the heater and behind the unit.
This will keep the heat soft and permeating, without causing the heater to sense that the temperature is higher than it truly is. Also, you will want to set some rocks on top of the heater while making sure that the unit’s grill is still properly fitted.
Benches
You will also need some benches in the space so you’re able to sit down and relax. There are usually two benches in a sauna: one that is lower to the ground, and one that is a step higher up.
The average size of a sauna bench is around 18 inches wide when measuring from the wall to the middle of the room. The bottom bench can be away from the wall or connected, depending on your personal preference, though a connected bench which would make it wider.
You will want to make sure that the benches are sturdy, and it is best to use more supports than you might need. However, to make this process as simple as possible, you can use two-by-two supports.
Don’t Forget Trim and Flooring
The trim for the corners of the sauna is optional, and you may not need it if the seams are tight and look good. However, if you want to add trim to give some extra style, you can place wood panels along the corners to square off the room and hide the corner seams.
When it comes to the flooring, you will want to use a cedar duckboard to finish off the room. Cedar, when heated, gives off a nice woody smell while using the sauna and lasts a long time. Lay the flooring as the finishing touch, and your sauna is complete.
Discuss Your Vision With DC today!
If you want to build a sauna in your home, you may want a little professional help to finish the project. Call Dirt Connections to speak to a professional about your project. We can assist you in any way you need and provide you with a free estimate. Discuss your vision with Dirt Connections today!
Summary

Dirt Connections was started with one goal in mind: providing quality residential and commercial construction services to clients on time and on budget. Reach out for more information on how we can support your next project.
For your convenience our estimates are free and by appointment. Call 703-940-9949 for a free estimate today!


