 Building a concrete driveway does not have to be as complex or as intimidating as it initially may seem. As long as you have the proper tools, materials and resources then you are ready to take on the DIY challenge. This step-by-step guide in this article will help you along the way.
Never start the project before you know exactly how to build a concrete driveway and have everything planned out. A concrete driveway will play an important role in the curb appeal of your home, so it is essential to take your time and ensure the job is done correctly.
Make Sure Ground is Graded for Damage
Before starting any landscaping project, it is important to ensure the ground is properly graded. This step should include examining the slope of the area and the quality of the underlying soil. This step may require professional assistance.
What if My Driveway is Sloped?
After you ensure the ground is properly graded, then you will need to determine the proper slope for your driveway. It is okay if your driveway is sloped, although a steep slope will certainly make the project far more difficult. Sloped driveways require more extensive planning, and it may be best to consult with a construction professional if the slope is steep. It is also important to ensure the driveway is not too level to make water runoff impossible. Standing water can cause concern. To prevent standing water during storms, aim for a 2- to 3-inch slope for your driveway, preferably leading to a drain.
Measure How Deep You Need to Dig
Another important step in the preparation process is determining how deep you will need to dig. Keep in mind that you will not only need to account for the amount of concrete you plan to lay, but you should also factor in the amount of depth needed for the gravel base.
 Although each situation is unique, a general recommendation is to dig 4 to 6 inches for the gravel base and 4 to 6 inches for the concrete for a total of 8 to 12 inches of depth. For long driveways, this can be quite the project, and using a shovel can be incredibly time-consuming and require a lot of physical labor. In those cases, it may be best to hire a professional to assist with the project.
What Tools are Needed
It is important to collect all of the necessary tools before you begin the project. Building a concrete driveway is a big project and it requires organization throughout the entire process. The tools you will need include:
- Isolated joint strips
- Flat shovel or hoe
- Darby or bull float
- Mason’s trowel
- Edger
- Jointer
- Guide board
Planning How Much Concrete You Need
Once you have the proper tools, you have accounted for the slope and your ground is graded properly, then you can determine how much concrete you need for the driveway. You can do this by factoring in the depth, length and width of the driveway. Remember it is better to have too much concrete than too little as you don’t want to run out of concrete in the middle of your project.
Pour Gravel Base
 You will need a gravel base for your concrete driveway. The gravel base provides a barrier between the underlying soil and the concrete. The gravel base should be between 4 and 6 inches in depth. This allows for a strong underlying layer to give your future driveway long-term durability. Be sure to properly set up the concrete forms before you begin to pour the gravel base. After pouring the gravel base and smoothing it out to make it even, compact it with a compacting machine.
Set Up Slab Dividers
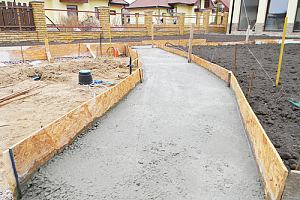
Driveways are long and should be built in sections. This prevents early damage to the concrete and makes the building process easier. You can create the sections for the driveway by using what are known as isolated joint strips. These strips provide a barrier between each section. They should be installed before you begin to pour concrete to make smoothing out the concrete easier.
Pour Concrete
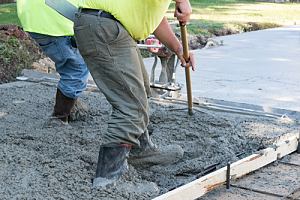
After the slab dividers are in place, you can begin to fill in the concrete driveway over the underlying gravel base. Start pouring the concrete in the corner of each form and allow the concrete to fill the entire section evenly.
You can smooth it out with a flat shovel or hoe, but be careful not to move underlying material around as it can get mixed into the concrete and cause aesthetic concerns with the finished product. Assuming you will leave the dividers in place, you can allow the concrete time to cure for several days.
Smooth and Let Solidify
The last step is to smooth and solidify the concrete. As mentioned, it will take several days for the concrete to cure. Make sure it is smooth right after applying it to each form, and be sure to leave it alone while it cures. The concrete driveway can be smoothed with a darby or a bull float.
You can also use a Mason’s trowel and an edger to create a well-defined edge for the concrete driveway. You can also use a jointer and a guide board to create concrete joints that reduce the risk of cracks in your driveway. After everything is smooth, edged and jointed, you should allow the concrete to dry and cure for three to five days before it is ready to use.
Contract the Pros at Dirt Connections
Dirt Connections is here to help with your concrete driveway needs. Feel free to contact us to find out more about our services and how we can help you build a concrete driveway.
We can assist with concrete construction and ensure the job is done with beautiful, long-lasting results. Each member of our team is trained and knowledgeable about how to build a concrete driveway, and we tailor our services to help you achieve exactly what you have in mind for the project.
Summary

Dirt Connections was started with one goal in mind: providing quality residential and commercial construction services to clients on time and on budget. Reach out for more information on how we can support your next project.
For your convenience our estimates are free and by appointment. Call 703-940-9949 for a free estimate today!


