Sheds frequently come without a ramp or with a ramp that is not strong enough to hold the weight of heavy equipment. For many, a ramp is an essential component for a shed. Fortunately, homeowners can build a reliable shed ramp quickly and at an affordable price.
Whether you found the perfect shed that needs a ramp added or you need to replace a less sturdy ramp with one that is more reliable, you can solve your problem by following the process laid out in this guide.
Steps to Build a Shed Ramp
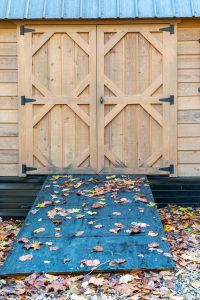 The following is a step-by-step guide on how to build a shed ramp. Every shed is unique, and you will need to evaluate your own situation to determine what all materials you will need. However, most ramp-building projects require the following materials to complete the project:
- Quality lumber
- Lag bolts
- Galvanized screws
- Paver base
- Concrete blocks
- Deck boards
Once you have gathered all the necessary materials and tools, you can begin the construction of your shed ramp by following the process below.
Attach the Ledger Board
A ledger board is an essential component of the shed ramp frame. It is important to create a flush surface before attaching the ledger board underneath the shed door. This can be accomplished with a 2×6 board. After this step, the ledger board needs to be securely anchored into place with lag bolts.
The lag bolts should be secured in a manner that does not obstruct the ramp stringers, or sides of the ramp. You can then estimate the slope for your ramp, making sure to measure the diagonal distance to ensure you are in line with the shed.
Set the Concrete Blocks
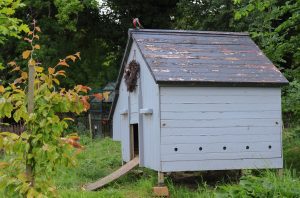 The next thing you will need to do is set the concrete blocks. Before you set the concrete blocks, you need to ensure you dig out a place — approximately four inches — to properly secure the blocks in position.
You should then consider laying a paver base to ensure each board is positioned evenly to ensure that the ramp will not lean in any direction. It is also encouraged to place and position a board just below the stringers.
Place the Stringers
A stringer allows for a secure upward slope of your ramp shed. It is essential to properly place and secure the stringers when building your ramp.
First, you should conduct the proper measurements to ensure the stringers are properly positioned and well-attached to the concrete block. To secure the stringers into place, we suggest adding additional concrete blocks in between each stringer so they do not slide.
Once you have the first stringer in position, you will need to secure the stringers into the concrete blocks with strong bolts. We suggest anchor bolts, which are designed for connecting structural elements into the concrete. You will likely need a ramset to properly drill the bolts securely into the concrete blocks.
Screw in the Board
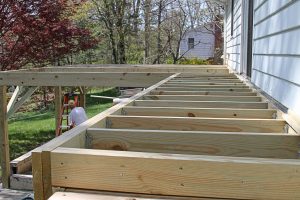 For the last step, you will need to connect the deck boards. The first thing to do is to ensure the boards are the proper size, and cut them to length if they are too long.
It is also helpful to drill holes in advance to allow effortless attachment to the stringers. You can then position one deck board at a time and screw them into the stringers, working your way from the bottom to the top of the shed ramp.
For the boards nearest the concrete blocks, we suggest adding concrete anchors rather than screws for extra support and a secure position of the deck boards.
Add the Paint (optional)
The last step is optional, but it is a great way to make your shed ramp a little more meaningful. Feel free to add paint as desired.
We recommend painting it to match the color of the shed, but you can get as creative as you’d like. You can paint the shed in any color or design that you find aesthetically pleasing.
The finished product should be an incredibly strong shed ramp that can handle the weight of a riding lawnmower. Depending on how often it is used, the shed ramp should last for years up to more than a decade before it needs a repair.
Keep in mind that each shed ramp is unique, each requiring differing measurements and tools and equipment to complete the project properly.
My Premium Special Offers
For The New Standard of Excellence for DIY Chicken Coops!
You’re ready to reap the benefits of having chickens.
And you want to build your own coop.
But you know there are many different blueprints on the market.
So you need the right one.
And you’re eager to finally start living an eco-organic lifestyle.
Raise your own Cluck Norris and Yolko-Ono.
Have your own farm fresh eggs.
Every. Single. Morning.
But you need a simple place to start.
Announcing: The World’s Largest Collection Of 16,000 Wood Plans
Each of the 16,000 projects are detailed enough to leave nothing to guesswork, yet simple enough for beginners.
Now You Can Build ANY Shed In A Weekend Even If You’ve Zero Woodworking Experience!
” How to Liven Up Your Home With Over
7250 Breathtaking Landscaping Designs WITHOUT Hiring Costly Professional Landscape Designers…
Have you been in a car accident recently?
The Claim Buster eBook is written to help those who have been injured in a car accident, and those who weren’t injured but have a property damage claim with an insurance company.
Dirt Connections Receives Commissions For Successful Sales Transactions
Contact Dirt Connections
 For free dirt for your projects, pool removal services, concrete paving, and foundation repairs, contact Dirt Connections today. You can also check out our other learning resources, such as our guide to building a ground level deck.
