Learning how to build a bench around a tree is a great way to add visual appeal to your backyard while also increasing the amount of seating there. It works well as both extra seating for outdoor gatherings or simply a comfortable place in the shade for you to rest.
Many people choose not to do this because they are worried they lack the technical skill needed to build the bench, or because they are worried they will harm the tree in the process of building the bench. However, it is possible for anyone with even rudimentary skills to build a good bench and there are ways to build and install it that will leave the tree unharmed.
Build a Hexagonal Bench
 Round benches are certainly beautiful, but they are extremely difficult to build. A hexagonal bench looks nice and is very simple to build. Choosing a hexagonal bench makes it possible for anyone to build a quality bench for their own backyard.
Plan for Tree Growth
As you are designing your bench, you need to build one large enough to accommodate the growth of the tree. This means ensuring the circumference of the bench if large enough, but it also means not attaching the bench directly to the tree. A common misconception is that benches like this are attached to the tree, but this is not true. Since trees are constantly growing, attaching a bench to one would mean that in a few years your bench would be off the ground.
Cut the Six Inner Boards
Once you know how big your bench needs to be, you can determine how long each of the six innermost boards should be. You will then need to cut them, using a thirty degree angle. This angle will be sufficient to create a hexagonal shape, no matter the size of the bench.
Cut the Middle and Outer Boards
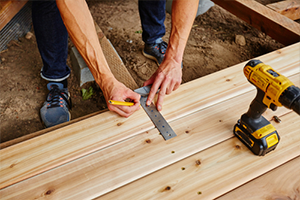
Take two planks and lay them next to the inner board. Use the angled cut ends of the inner board as a guide, and extend the thirty degree cut line over the middle and out boards. Be sure to mark the line clearly and double check that it is accurate. Once you are certain that the measurements are correct, cut the outer and middle boards.
Cut and Assemble the Bench Supports
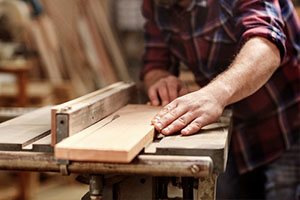 Each bench support will consist of two 2×6 legs. Use two 1×4 cross braces along the top of the legs to hold them together. You will need galvanized carriage bolts, washers, and nuts to secure everything together. Tighten the bolts with a socket wrench until the wood compresses slightly. Make six bench supports in total.
Use the Bench Supports to Attach Seat Sections Together
Join two seat sections together, and drill pilot holes into the joint to allow the support to hold everything together. Then drill one pilot hole at both ends of the assembly. Attach the support to the joint to hold the two seat sections together. Do this twice, leaving the remaining sections until you have positioned the bench around the tree.
Attach all of the supports. You should have four bench seat sections, with five supports attached. The two open ends of the bench will each have a support with one side exposed, and one screwed on to a bench seat.
Countersink your Screws
First, turn the assembled bench sections upright. You will need to drill countersunk pilot holes through the top of the bench and into the support. This way the screw heads will be below the surface of the bench, and there is no risk of them catching and tearing clothing. This requires a specialized drill bit, and so it is often skipped. However, it is worth the extra time, money, and effort.
Countersunk screws give a much nicer, even professional, appearance to the finished product. They also make the bench much more comfortable to sit on, since there will be no exposed screw heads.
Level the Bench
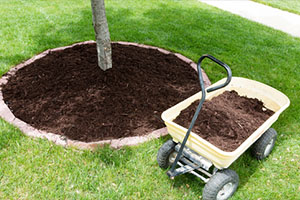 Often, this is the most frustrating part of the project. The bench must be level. It will not be stable or comfortable if it is not leveled. The easiest way to level the bench is to remove soil around the tree. Be sure to avoid any roots as you do this.
This may require a lot of work, depending on how uneven the ground was. Alternatively, if you would rather not remove soil, you can add soil and grade it to be level. This will require you to buy quality topsoil or fill dirt, but fortunately you will not need much of it for such a small area. This step is crucial. If the bench is not level it will have a tendency to tilt and tip, which will not only be uncomfortable, but will put uneven strain on the joints.
Finish Assembling the Bench Around the Tree
Position the assembled bench around the tree once the ground is leveled. Check one more time that it really is level before finishing assembly to avoid time-consuming disassembly of the bench.
Once you are certain that the ground and the bench are level, attach the remaining bench seat boards and the final support. Countersink the screws from the top to secure the entire assembly together without leaving screw heads exposed.
Coat with Sealer
To extend the life of the bench and protect it from the elements, coat the wood with a layer of your preferred sealer. If you skip this step, your bench is going to wear out much more quickly. Sealing and staining the wood is better than painting it. It will keep the natural beauty of the wood and preserve it for much longer than a coat of paint would.
Leveling or grading the area for the bench is one of the most challenging parts of the process, but it is also one of the most critical steps. If you need help or would like more information about using topsoil or dirt to level or grade your yard for a bench, contact Dirt Connections today.
My Premium Special Offers
For The New Standard of Excellence for DIY Chicken Coops!
You’re ready to reap the benefits of having chickens.
And you want to build your own coop.
But you know there are many different blueprints on the market.
So you need the right one.
And you’re eager to finally start living an eco-organic lifestyle.
Raise your own Cluck Norris and Yolko-Ono.
Have your own farm fresh eggs.
Every. Single. Morning.
But you need a simple place to start.
Announcing: The World’s Largest Collection Of 16,000 Wood Plans
Each of the 16,000 projects are detailed enough to leave nothing to guesswork, yet simple enough for beginners.
