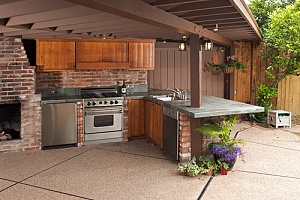
 Having an open-air kitchen in your backyard is a great way to entertain guests outside, or just a nice alternative to your usual family dinner indoors. It also gives greater cooking flexibility than your indoor kitchen, giving you more meal options to choose from.
While pre-built outdoor kitchens might be easier to install, building one yourself is going to be much more satisfying. In this article we will guide you through the step-by-step process of building your own outdoor kitchen, from drawing up your plans and site preparation, to installing your appliances.
Planning your Outdoor Kitchen
There are a few things you need to do before you begin work on your outdoor kitchen:
- First you need to find out if you need a building permit
- Draw up plans for your kitchen
- Have your plans reviewed by a building contractor
- Purchase appliances and accessories
- Obtain tools needed for the job
Before you start doing any physical work, you need to plan your outdoor kitchen. Draw up some blueprints, deciding where you want the grill, sink, counters, and any other features you decide to add. Figure out where your outdoor kitchen is going to be in your yard and plan accordingly.
One suggestion, especially if you have a large back yard, is to keep your outdoor kitchen as close to the house as possible.
While making your plans, decide what appliances and hardware you intend to use. It is also a good idea to purchase them beforehand. This way you will know the exact measurements so you can effectively build around them.
Make sure any appliances you purchase are outdoor rated and that you have the proper cutout measurements. The last thing you need is to build the patio and then not be able to fit your appliances into it.
Keep in mind, also, that you will need to allow for proper plumbing for sinks, as well as gas lines for your grill (if using a gas grill). Know where the pipes and lines will be so you can plan other features (like cabinet storage) around them.
After you initially draw up your plans, it is highly recommended that you consult with a licensed building contractor, as they will be able to give you suggestions on how to improve it.
Preparing the Site
 Wherever you plan to build your outdoor kitchen, you need to make sure the area is properly prepared. Remove any trees, plants, bug nests, debris: anything that will be in the way of building your kitchen.
Next, prepare the ground. Begin loosening up the ground (called scarifying) in the area you plan to build the kitchen. You can do this with a shovel or a scarifying machine. You want the soil loose so you can search for any roots or debris hiding beneath the surface. This will make it easier to level the ground and gives you a smooth surface to build on.
As you are leveling, you may find areas where you need to fill with dirt or soil. We highly recommend consulting with a Virginia fill dirt contractor at Dirt Connections for more information and to get a quote.
Once the ground is prepared and leveled, you will need to compact the soil to a density of at least 95%. Rent a compactor and drive it over the area, treating the soil with water to keep it moisturized, until the soil hardens.
Aside from the fill dirt and compactor, you will also need the following tools:
- Shovel, sharp pick, and scarifying machine for digging up and loosening the soil
- A grader or rake
- Rope, white washer, and pegs for outlining the site
- Tape measure
- Circular saw for cutting materials
- Welder (if making the island frame out of metal)
Building the Patio
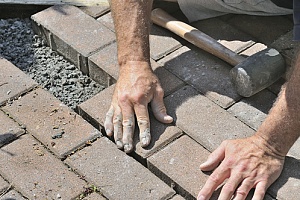
The next step, once the ground is prepared and properly compacted, is to lay down a hard surface for your kitchen. You can lay down bricks, pavers, concrete, or wood. The materials you decide to use will depend on your preferences, skill level, and budget.
Once you have sturdy foundation and your patio is built, then start building the structures that will later house all the appliances you chose. As before, this can be any material you desire. Some people like to build a metal frame, but if money is tight 2x4s and pressed plywood work just fine.
 If you noted where gas lines and pipes will go on your plans, this is when you will implement those details. We do recommend hiring a licensed plumber and electrician to help you with putting the proper lines and piping in and preparing them for extreme weather conditions.
Installing Appliances
Once you have everything built and the proper plumbing and electricity is in place, install your appliances where you planned them to be. Along with a grill and a sink, you can add a refrigerator (to eliminate running back and forth into the house), a counter for preparing food, and proper storage for cooking and cleaning utensils.
One fun addition you can incorporate into your outdoor kitchen is a pizza oven. Instead of ordering delivery for your pizza nights, make the pizzas yourself in your outdoor kitchen.
If you want to add this feature, it should be included in your initial plans. That way you not only have everything you need, but the oven can be built while you build the patio and the rest of the kitchen. Additionally, this will eliminate the inconvenience of doing extra work later to add the pizza oven.
In addition to the tools and materials you need for the kitchen, you will need cinder blocks, concrete mix, bricks, and an oven kit for the pizza oven.
Before assembling the oven itself, you will first need to build the raised platform on the foundation you already have. Then follow the instructions in the oven kit to build and your pizza oven. Last step is to attach the chimney flue to the oven.
For more information about building an outdoor kitchen, building a pizza oven, or to order any fill dirt you may need for the project, please contact someone at Dirt Connections.


