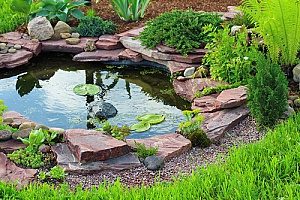
 A properly constructed water feature in your backyard is relaxing and beautiful. It attracts wildlife. It is inviting and interesting. Hosting fish in your pond can also add to the aesthetic of your backyard. Though a backyard pond requires a great amount of landscaping, it is by no means a tough project.
How to Build a Backyard Pond By Yourself
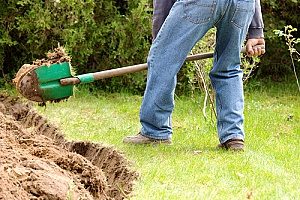
Building a pond in your backyard is a fairly simple process, but one that is labor intensive. Even a small backyard pond requires heavy lifting—digging, moving dirt, hauling rocks, and backfilling. The bigger the pond, the more labor it will require. You can get help, or if you are up to the job you can do it yourself in a weekend or two. Here are the steps:
1. Pick the pond’s location.
Find a level spot in your yard large enough to accommodate the size pond you want. A level spot is better than a slope. On a slope, your backyard pond will fill and possibly overflow with water runoff during heavy rain. If your yard has no flat area, you may want to bring in some fill dirt to create a level area and stabilize what will be the deeper end of the pond.
Ideally, the backyard pond should have sun for a good part of the day and some shade. Do not place it under a tree or you will be dealing with roots and unwanted leaf debris.
Once you have the location identified, lay a garden hose or a rope on the ground to outline the pond size and shape. For a naturalized look, use free form, undulating, curved shapes. For a more formal look, you will want a rectangular or square shape. Move and reposition the hose until you find the outline of a shape you like. Use spray paint to paint the outline. Call Miss Utility (811) to make sure you are not going to dig into any underground cables or utilities.
2. Dig, dig, dig.
 Dig a trench about three inches deep all the way around the outside edge of the backyard pond. It should be about one foot wide. This will be the ledge for your pond’s edging stones.
You will then want to make plant shelves wherever you intend to place plants. Each plant shelf should be about ten to twelve inches deep inside the pond outline. Any deeper, and the plants will drown.
Then, move to the center of the pond area and begin digging, working your way out to the plant shelves from the center. Keep the bed of the pond level or slightly sloped by digging it out in layers of about six to ten inches at a time. Keep the sides and walls sloped outward to help protect the liner during freezing temperatures. Dig to a minimum of 18 inches in depth.
If you will have fish in the pond, you will need to create a deep area for them to overwinter and seek cooler water in the summer. This area will need to be deep enough where it will not freeze in the winter, usually about three feet deep and three feet wide. Your pump and/or water fountain should be located far away from this area.
If your pond is too large to do the digging by hand, consider renting heavy equipment or hiring a contractor to dig it for you.
3. Level the pond floors and pond edges.
Clean up and level the pond bed by removing stones, sticks, and any organic material that may be in the excavated area. Level the edges by laying a board across the excavated area and setting on it. Levelling the edges will make the pond look nicer and will avoid run off problems later on.
Bring in enough fill sand to cover the bottom of the ledges and the pond bed with about one inch of fill sand. Using fill sand will make the job of levelling easier, fill any holes created by removing debris, provide a safe, rock-free surface for the pond liner to rest on, and stabilize the pond bottom. You can also provide additional padding for the liner by covering the sand and the sides of the pond with a ½ inch thick layer of newspapers.
4. Install a pond liner.
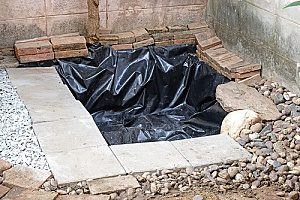
 Once the bottom is levelled and cleaned of debris, you are ready to install the pond liner. This is a heavy job, and you may need a helper for this part. Lay the liner in the excavated area, making sure it overlaps all of the edges of the pond and is large enough to reach a few inches past the edging stones. Smooth out all creases and press it into any crevices. Once laid out, place flat stones on the edge of the liner to hold it in place.
5. Slowly fill the pond with water.
As the water fills the backyard pond, smooth out the wrinkles that may appear in the liner. This may require that you re-adjust the liner itself. Also, you may have to move the liner around a bit to keep it overlapping the pond ledge at the pond edges. If you discover the liner is too short or one side or another, you will need to move the liner or stop filling the water and backfill the area of the pond where the liner is too short to cover the pond ledge.
As the water level rises, begin removing the stones that have held the liner in place. Once the backyard pond is full, trim excess liner leaving enough to reach two or three inches past the edging stones.
6. Place the edging stones.
Place the edging stones on the ledge around the edge of the pond. The first layer of edging stones should be relatively flat so they will stay in place and provide a stable surface for additional layers of edging stones.
7. Add pump and/or fountain.
If you want to keep the water clean, you will need a pump and a filter. Make sure you buy the appropriate size for the pond and follow the manufacturer’s directions for installation.
Contact a Professional Dirt Contractor for More Information
Get help before you start digging. Call Dirt Connections to discuss your project and get more information about what materials you may need to ensure your backyard pond is a success and schedule your free fill dirt delivery.


